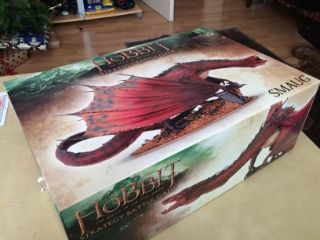
And so it begins....

First up the box is fantastic, heaven duty cardboard covered in photos. The instructions are printed on the inside sleeve.

The inner sleeve appeals very much to my geeky side.

Everything is nicely packed.

All the bits laid out following cleaning, the casts are pretty good with a couple of 1-2 mm mold-slip lines which will come out with a little work.

He's a big old beastie.


First thing to know about this kit is the detail, his skin looks real and each of the horns are beautiful crisp and sharp.
I started on the head the neck pictured above is 5 parts which all fit well together, of course with this size of kit there is a lot of filling to do. Now I'm not fantastic with green stuff but anyone looking for advice, I do have a little.
1) use proper tools, I use GW's new set and they are fantastic
2) make sure you green stuff is well mixed
3) keep your tools wet, regularly dipping in clean water or the putty will stick to them
4) let the lines of the model guide you when shaping the green stuff once you have filled a gap to continue any detail that should be there
5) let it cure for 30-60 mins before trying to add detail (I fill with it straight away as it's more workable)
6) be careful not to touch it whilst filling other gaps (everyone has done it)
I'm going to crack on, I'm posting this knowing the photos aren't working but with the hope of getting some advise as URL links are not working for me
Chris
 Top
Top Top
Top Top
Top Top
Top Top
Top Top
Top Top
Top Top
Top Top
Top Top
Top Top
Top Top
Top Top
Top Top
Top Top
Top Top
Top Top
Top


