All times are UTC


It is currently Fri Nov 15, 2024 8:59 am


Post new topic Reply to topic  [ 23 posts ]  Go to page 1, 2  Next
Author Message
 Post subject: DaDuffer's WIP (Update 18/02/13) Tale of 4 gamers, Isengard
PostPosted: Thu Nov 19, 2009 2:31 pm 
Wayfarer
Wayfarer
Offline

Joined: Wed Oct 21, 2009 2:09 pm
Posts: 37
Location: Leeds
I've decided that having a wip might give me the extra motivation to keep my Isengard minis flowing.

I started last month (the hobby that is) and have so far got 8 pikes, 6 sword and shield and 2 captains painted with a further 11 ss, 10 pikes, 6 scouts, Lurtz, Ugluk and Grima to complete. Plus a random backlog of Fellowship model and some other characters, which I'll work on when I get the paints and the time.

With some tips and encouragement I'm hoping I can improve my painting from it's humble beginnings, improve my mini photography and motivate myself to get these finished before the New Year (though with moving to London happening this weekend and a new job who knows).

To start things off I've uploaded the finished Captains to my gallery, (hints and tips before I start some more minis much appreciated) and I'll try to update progress as often as I remember to take photos.


Last edited by DaDuffer on Mon Feb 18, 2013 5:07 pm, edited 5 times in total.
Top
  Profile  
Reply with quote  
 Post subject:
PostPosted: Thu Nov 19, 2009 3:29 pm 
Craftsman
Craftsman
User avatar
Offline

Joined: Mon Aug 31, 2009 10:27 am
Posts: 446
Location: Chiang Mai, Thailand
Images: 2
Your warrior is quite good. It could do with a wash, if you have any. The hands should be the same colour as the other bits of flesh and you may want to tone down some of the colours as they are a little bright for an uruk. You will want to use as little paint as possible on the chain mail. Just a thing black undercoat and dry brushed metallics. Otherwise the details get obscured. You will want to put a little more effort into the bases. A dark grey with some light grey dry brushed on would make a great improvement. If you want it to look more natural, brown base coat, dark green patches. Light brown dry brush on brown and light green dry brush on green, dry brush of bleached bone over the whole thing. The dry brushes need to be quite "thin" but other than that it will look good. I you want I can post some examples to help you out.

_________________
“But God demonstrates his own love for us in this: While we were still sinners, Christ died for us.” -Romans 5:8
Top
  Profile  
Reply with quote  
 Post subject:
PostPosted: Thu Nov 19, 2009 3:45 pm 
Wayfarer
Wayfarer
Offline

Joined: Wed Oct 21, 2009 2:09 pm
Posts: 37
Location: Leeds
Thanks Dwarf Lord.

I only have 10 paints at present, working on a tight budget but I definitely want to do the bases when I can, do you think the sand/gravel is too coarse or is it ok? I'm unsure at present and tempted to get a finer mix before I start painting my bases and then I'll add some static grass too.

I was planning on painting the next batch's cloth with scorched brown instead of snakebite to darken them up some more, which other colours do you think don't work very well?

I'm finding getting the paint quantity right for the chainmail very difficult at present, any good tips?

Don't the Uruks all have gloves though, I was under that impression based on the models which is why I've painted the hands a different colour to the flesh, or am I getting confused?

Thanks again, the more help the better and hopefully I'll get better with some practice. 8)
Top
  Profile  
Reply with quote  
 Post subject:
PostPosted: Thu Nov 19, 2009 6:04 pm 
Elven Warrior
Elven Warrior
Offline

Joined: Sun Feb 22, 2009 4:46 pm
Posts: 881
Location: United Kingdom
That Uruk looks pretty good DaDuffer! 8)

DaDuffer wrote:
do you think the sand/gravel is too coarse or is it ok? I'm unsure at present and tempted to get a finer mix before I start painting my bases and then I'll add some static grass too.


I would be tempted to get some finer basing material, those pieces looks quite big - more like a bed of stones then soil etc.

DaDuffer wrote:
Don't the Uruks all have gloves though, I was under that impression based on the models which is why I've painted the hands a different colour to the flesh, or am I getting confused?


You are correct. The Captain is indeed wearing gloves so it makes sense painting them a different colour.
Look closer next time Dwarf Lord of Ered Luin! :P


Keep up the good work DaDuffer! :wink:

_________________
TO9G - 2010 Isengard
Top
  Profile  
Reply with quote  
 Post subject:
PostPosted: Thu Nov 19, 2009 6:29 pm 
Wayfarer
Wayfarer
User avatar
Offline

Joined: Sun Apr 26, 2009 6:45 pm
Posts: 39
Location: UK
Love the uruk-hai, keep on painting! And yes the uruk-hai is wearing gloves.
Top
  Profile  
Reply with quote  
 Post subject:
PostPosted: Thu Nov 19, 2009 7:18 pm 
Elven Warrior
Elven Warrior
User avatar
Offline

Joined: Fri Aug 28, 2009 3:46 pm
Posts: 897
Location: Hear the sinister whisper of steel on leather? The quiet footsteps? You've found me.
DaDuffer wrote:
Quote:
I'm finding getting the paint quantity right for the chainmail very difficult at present, any good tips?


Dip the tip of the brush in the metallic color of your choice. On a (Dry!) tissue or paper towel, wipe the paint of the brush until no more is coming off. Then lightly brush over the chainmail to taste. :)

Hope that helps! :-D

Also you could wash with watered-down black paint afterwards if you like. :wink:

_________________
Flying is the practice of trying to crash into the ground and missing.
Top
  Profile  
Reply with quote  
 Post subject:
PostPosted: Thu Nov 19, 2009 9:20 pm 
Wayfarer
Wayfarer
Offline

Joined: Wed Oct 21, 2009 2:09 pm
Posts: 37
Location: Leeds
Thanks all.

I get the theory of drybrushing and what not, I just get very inconsistent results :? , more practice should do the trick I suppose.

I love using badab black wash, it makes such a difference to the mini.

I've just started 4 ss uruks, gone for tin bitz armour, dark flesh flesh and scorched brown cloth this time and have given them a wash too. Will do some highlighting and detail work tomorrow.

Not sure if I like just how similar scorched brown is to dark flesh, I might try a mix of codex grey and black on my next lot for the cloth and see how that works. At least my army will have some variety about it I suppose.

Any other variations I could try for Uruk flesh, I have a very limited paint selection at present but will get some more paints as soon as I can.

I'll post pics tomorrow after drybrushing and detailing.

Thanks again. :yay:
Top
  Profile  
Reply with quote  
 Post subject:
PostPosted: Fri Nov 20, 2009 10:36 am 
Wayfarer
Wayfarer
Offline

Joined: Wed Oct 21, 2009 2:09 pm
Posts: 37
Location: Leeds
Did some highlighting and am getting happier with my painting :D.

Decided to use a 2nd wash after the highlighting to blend it back together, I think it makes a massive difference.

http://www.one-ring.co.uk/phpBB2/album_ ... ic_id=9206

I am pretty inconsistent still but the I'm very happy with the effect on 2 out of the 4, the pictured one is average.

Thanks for the help so far guys, I'll add another update when I've had time to try some more minis. Keep the advice coming :yay:

PS: How do I get the pic to appear in the post, do I need to host elsewhere to get it to link
Top
  Profile  
Reply with quote  
 Post subject:
PostPosted: Fri Nov 20, 2009 1:26 pm 
Craftsman
Craftsman
User avatar
Offline

Joined: Mon Aug 31, 2009 10:27 am
Posts: 446
Location: Chiang Mai, Thailand
Images: 2
Great improvement. My mistake with the gloves but they were still far too bright. The colours are a lot better now. For the chain mail you want as little paint on it as possible. Get the brush really dry, all that should be left on it are a whole bunch of small particles. The wash clearly helps but be warned, sometimes it can turn out really shiny. It ruined my Radagast but I've recently learned on OR that it is because the wash separates after a while, so you'll have to watch out for that in the future. The rocks are a little large. See if you can find some sand near you house. It doesn't have to be too fine, the rocks look fine to me. Just paint them and they'll look a lot better.

If you are already using picasa you could just upload it to your web album from your computer. Then open the pictures and click, view image. Then copy the url and paste it. Then select the url and click Img. I find that this is the easiest way as photobucket can be slow and the sizes aren't always right.

_________________
“But God demonstrates his own love for us in this: While we were still sinners, Christ died for us.” -Romans 5:8


Last edited by Dwarf Lord of Ered Luin on Sat Nov 21, 2009 6:29 am, edited 2 times in total.
Top
  Profile  
Reply with quote  
 Post subject:
PostPosted: Fri Nov 20, 2009 2:02 pm 
Elven Warrior
Elven Warrior
User avatar
Offline

Joined: Fri Aug 28, 2009 3:46 pm
Posts: 897
Location: Hear the sinister whisper of steel on leather? The quiet footsteps? You've found me.
DaDuffer wrote:
Quote:
PS: How do I get the pic to appear in the post, do I need to host elsewhere to get it to link


Yeah, upload it on like PhotoBucket or TinyPic, then copy-paste the IMG code in a new post. 8)

Great improvement on the Uruk! :yay:

_________________
Flying is the practice of trying to crash into the ground and missing.
Top
  Profile  
Reply with quote  
 Post subject:
PostPosted: Sun Dec 06, 2009 4:31 pm 
Wayfarer
Wayfarer
Offline

Joined: Wed Oct 21, 2009 2:09 pm
Posts: 37
Location: Leeds
finally got round to getting on with some painting again today after moving down to London.

Started some scouts and Lurtz but ended up concentrating on Lurtz as a treat, my first proper hero.

Not quite finished need to touch up his quiver after a slip and add highlights to the bow and his lower leg armour and then base him, which I'll do once I've got some practice on some lesser minis.

<a href="http://s876.photobucket.com/albums/ab321/DaDuffer-1987/?action=view¤t=Lurtzmerge.jpg" target="_blank"><img src="http://i876.photobucket.com/albums/ab321/DaDuffer-1987/Lurtzmerge.jpg" border="0" alt="Lurtz - Merge"></a>

Any other ideas for improvement?
Top
  Profile  
Reply with quote  
 Post subject:
PostPosted: Sun Dec 06, 2009 5:45 pm 
Loremaster
Loremaster
User avatar
Offline

Joined: Tue Nov 30, 2004 8:23 pm
Posts: 2367
Location: Hobbiton, The Shire http://botwt.wordpress.com
Personally I never liked this model, but your paint job really helps out this sculpt...nice job!

_________________
No one feels as helpless as the owner of a sick goldfish.
Top
  Profile  
Reply with quote  
 Post subject:
PostPosted: Mon Dec 07, 2009 6:42 am 
Elven Warrior
Elven Warrior
Offline

Joined: Mon Sep 07, 2009 2:12 pm
Posts: 665
Location: Hasselt, Belgium
I like the model and your paint job!

_________________
Parva Mundi
Top
  Profile  
Reply with quote  
 Post subject:
PostPosted: Mon Dec 07, 2009 7:45 pm 
Elven Warrior
Elven Warrior
Offline

Joined: Sun Feb 22, 2009 4:46 pm
Posts: 881
Location: United Kingdom
Looks very nice, I like the grey cloth - nice shading + highlights. 8)

_________________
TO9G - 2010 Isengard
Top
  Profile  
Reply with quote  
 Post subject: DaDuffer's WIP - Numenor (Update 06/04/2010)
PostPosted: Tue Apr 06, 2010 7:12 pm 
Wayfarer
Wayfarer
Offline

Joined: Wed Oct 21, 2009 2:09 pm
Posts: 37
Location: Leeds
I'm just starting to model a Numenor force and though the models available are limited I'm hoping some differing paint schemes and my first ever conversions will make it varied in appearance if not in gameplay.

So far I have: Isildur, 10 spearmen and 20 archers to paint :D
8 swordsmen, 6 spearmen and 3 archers poorly painted from an old collection (to be redone or replaced) :?

I plan on adding: 8 more swordsmen, Elendil and maybe a Minas Tirth Captain, converted to represent a heavy armour wearing, shield wielding Captain of Numenor.

To kick things off here are some clickable photos of Isildur and my "Isildur's Royal Guard" themed spearman.

<a href="http://s876.photobucket.com/albums/ab321/DaDuffer-1987/?action=view¤t=IsildurBackNoFlash.jpg" target="_blank"><img src="http://i876.photobucket.com/albums/ab321/DaDuffer-1987/th_IsildurBackNoFlash.jpg" border="0" alt="Isildur Back" ></a>

<a href="http://s876.photobucket.com/albums/ab321/DaDuffer-1987/?action=view¤t=Isildurwithflash.jpg" target="_blank"><img src="http://i876.photobucket.com/albums/ab321/DaDuffer-1987/th_Isildurwithflash.jpg" border="0" alt="Isildur Front w flash" ></a>

<a href="http://s876.photobucket.com/albums/ab321/DaDuffer-1987/?action=view¤t=WarriorIsildurScheme.jpg" target="_blank"><img src="http://i876.photobucket.com/albums/ab321/DaDuffer-1987/th_WarriorIsildurScheme.jpg" border="0" alt="Warrior Front" ></a>

<a href="http://s876.photobucket.com/albums/ab321/DaDuffer-1987/?action=view¤t=WarriorIsildurSchemeBack.jpg" target="_blank"><img src="http://i876.photobucket.com/albums/ab321/DaDuffer-1987/th_WarriorIsildurSchemeBack.jpg" border="0" alt="Warrior Back" ></a>

C&C most welcome :-D
Top
  Profile  
Reply with quote  
 Post subject:
PostPosted: Wed Apr 07, 2010 1:58 pm 
Craftsman
Craftsman
User avatar
Offline

Joined: Mon Aug 31, 2009 10:27 am
Posts: 446
Location: Chiang Mai, Thailand
Images: 2
Isildur looks very good. The metal is very nice and the highlighting on the clothing is also pretty good. Some more work on the face and he'll look great.
The colours on the spearman are nice but the white areas look too big. I would suggest toning down the white so that it doesn't stand out too much.

_________________
“But God demonstrates his own love for us in this: While we were still sinners, Christ died for us.” -Romans 5:8
Top
  Profile  
Reply with quote  
 Post subject:
PostPosted: Sun Apr 11, 2010 8:20 pm 
Wayfarer
Wayfarer
Offline

Joined: Wed Oct 21, 2009 2:09 pm
Posts: 37
Location: Leeds
I've tried to add some eye detail to Isildur but eyes are at the edge of my ability at present, I'm always really nervous about adding them and making a mess of a near finished mini :o

<a href="http://s876.photobucket.com/albums/ab321/DaDuffer-1987/?action=view¤t=IsildurFinished.jpg" target="_blank"><img src="http://i876.photobucket.com/albums/ab321/DaDuffer-1987/th_IsildurFinished.jpg" border="0" alt="Isildur Finished" ></a>

I've done some more work on the Warrior too, hopefully the cream/white looks better with more colour on the model. I want to keep it for the trim as it makes the model look more important than the regular troops who will be painted with grey trim.

<a href="http://s876.photobucket.com/albums/ab321/DaDuffer-1987/?action=view¤t=WarriorIsildurSchemeFinished.jpg" target="_blank"><img src="http://i876.photobucket.com/albums/ab321/DaDuffer-1987/th_WarriorIsildurSchemeFinished.jpg" border="0" alt="Finished Warrior Front" ></a>

<a href="http://s876.photobucket.com/albums/ab321/DaDuffer-1987/?action=view¤t=ThreeHeroes.jpg" target="_blank"><img src="http://i876.photobucket.com/albums/ab321/DaDuffer-1987/th_ThreeHeroes.jpg" border="0" alt="Three Heroes" ></a>

I've attempted some better photography too, though without a proper macro lens it's still a little tricky to get good results :roll:
Top
  Profile  
Reply with quote  
 Post subject: Re: DaDuffer's WIP (Update 06/04/10) - Numenor
PostPosted: Sat Feb 16, 2013 6:02 pm 
Wayfarer
Wayfarer
Offline

Joined: Wed Oct 21, 2009 2:09 pm
Posts: 37
Location: Leeds
Long time no post. Moria Madness and the hobbit release have tempted me back into the game. MM has arranged a tale of 4 gamers, and this month sees the addition of the final 200 points to the army, including a centre piece model.

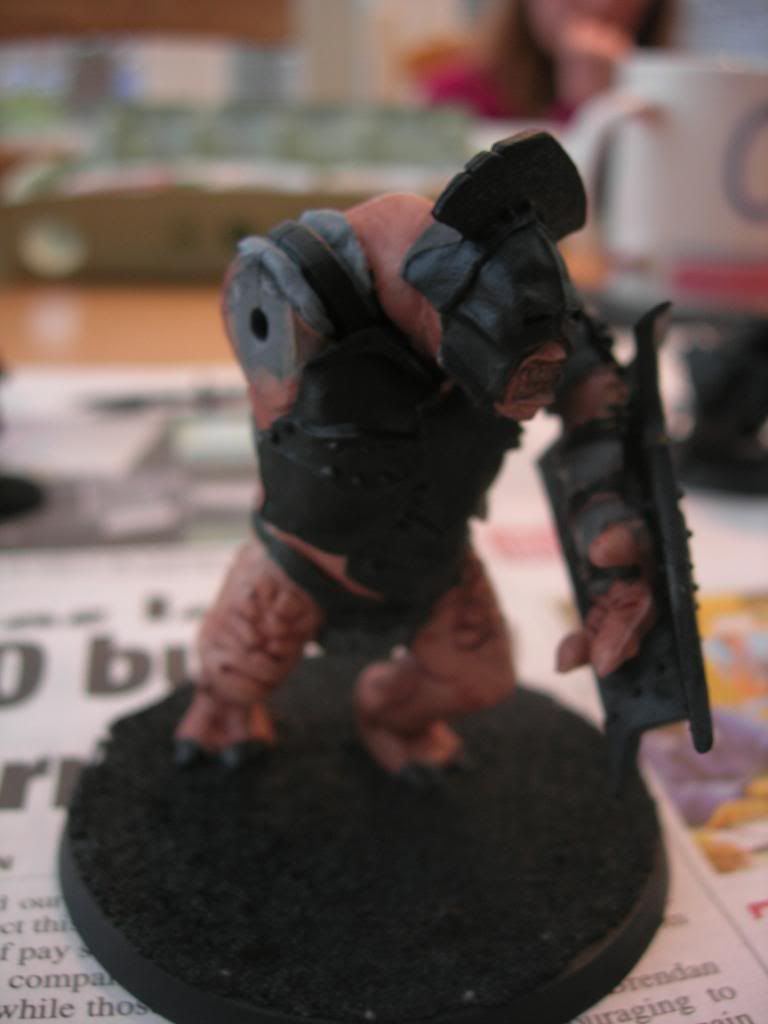
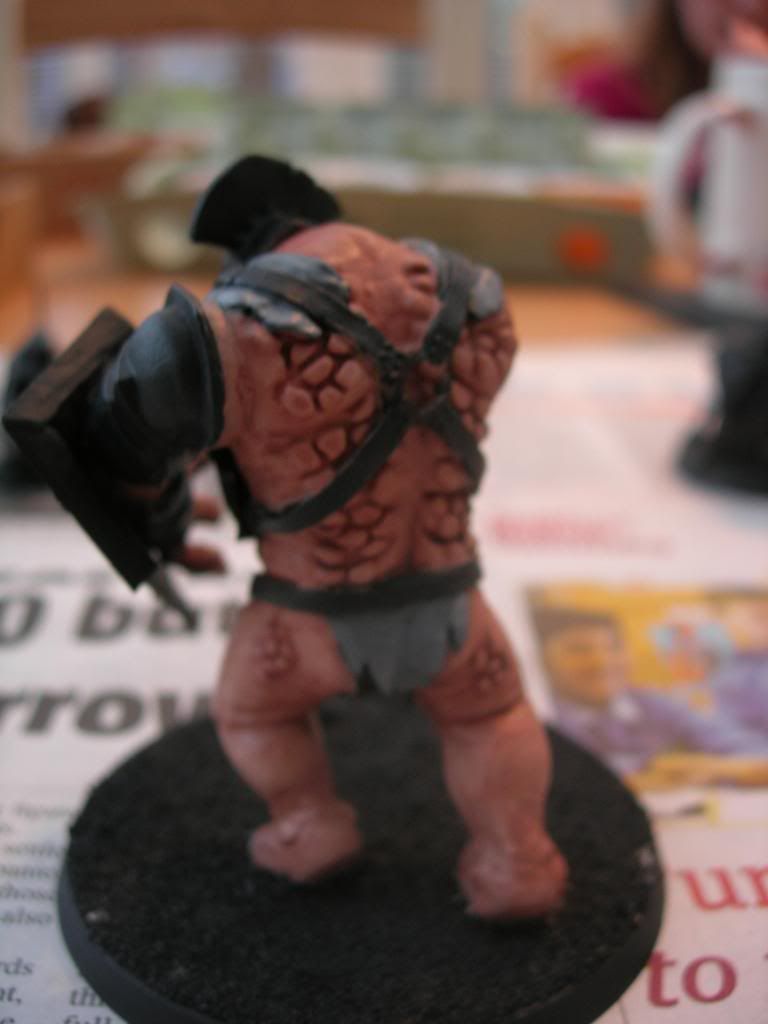
I started work on my final 200 points today. First up my centre piece, an Isengard troll.

Image

Image

Sorry the photos are a little rubbish, I'll try to get some better ones in daylight tomorrow. I'm quite pleased with the skin, I tried to blend through 3 layers and then washed ogryn flesh to finish it off, with more applied where the lumps are.

My other points are spent on a mounted Ringwraith that I picked up in a batch from ebay and it's a good excuse to paint, I'll post some quick snapshots in the next post.
Top
  Profile  
Reply with quote  
 Post subject: DaDuffer's WIP (Update 16/02/2013) - Tale of 4 gamers, Iseng
PostPosted: Sat Feb 16, 2013 6:09 pm 
Wayfarer
Wayfarer
Offline

Joined: Wed Oct 21, 2009 2:09 pm
Posts: 37
Location: Leeds
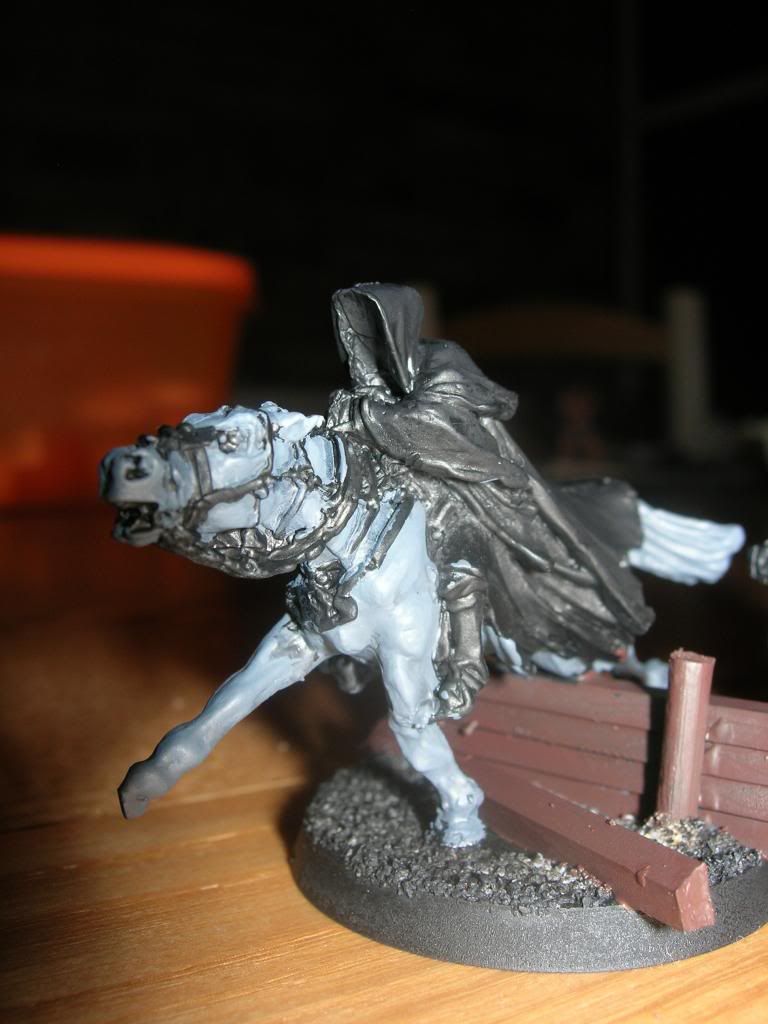
So on inspecting my Wraith I noticed the horses legs didn't seem to fit the base right, and on further inspection the weight bearing leg came off in my hand.

To solve the issue I tried to be a little creative:

Image

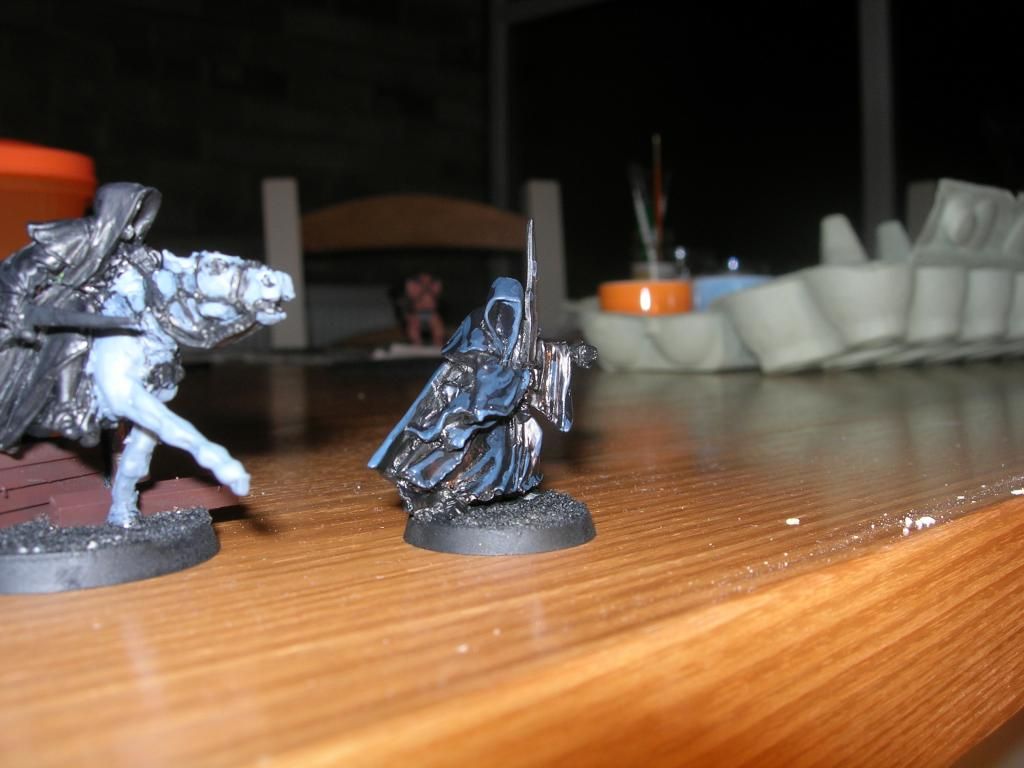
I bodged together a quick fence out of cut up sprue and then used it to bear the weight of the model on the base. I've made a start on the horse, and the cloak of the foot model;

Image

In real light the cloak is a lot darker and less contrasty, I'll aim for a better pic in daylight tomorrow. I'm relatively happy with the shade up to dark blue, but find it difficult when the colours are all so dark, which is very evident when photographed under harsh light :( . How do you guys work when the colours are dark and so similar?

Tips appreciated so I can make a better job of the mounted wraith :D .
Top
  Profile  
Reply with quote  
 Post subject: Re: DaDuffer's WIP (Update 16/02/13) Tale of 4 gamers, Iseng
PostPosted: Sat Feb 16, 2013 6:27 pm 
Elven Warrior
Elven Warrior
User avatar
Offline

Joined: Sun Jun 01, 2008 7:29 pm
Posts: 968
Location: Suffolk, England
i have those same contrast pic problems lol i suck at taking photos >.< they all look great and love the fence on the base!

_________________
[url=http://one-ring.co.uk/viewtopic.php?f=50&p=298502#p298502]Corsair's WIP Thread - 03 Dec 12 Update[/url]
Top
  Profile  
Reply with quote  
Display posts from previous:  Sort by  
Post new topic Reply to topic  [ 23 posts ]  Go to page 1, 2  Next

All times are UTC


Who is online

Users browsing this forum: No registered users and 402 guests


You cannot post new topics in this forum
You cannot reply to topics in this forum
You cannot edit your posts in this forum
You cannot delete your posts in this forum
You cannot post attachments in this forum

Search for:
Jump to: