Well met dear travellers and welcome to another of Dr Grant’s musings on his latest exploits on the UK tournament scene. This time we’re discussing the terrifying highs and devastating lows of the Desolation of Cumberbatch tournament held at Slayer Gaming in Mansfield over the 3rd and 4th of May 2014. This was a 6 game tournament held over two days so as ever will not be short in the telling, in fact, this report is so long that it exceeds the One Ring's maximum post length so I've had to finish it in the comments! So, settle down at the back, find your comfiest armchair, brew that warmest cup of tea, find your largest packet of biscuits and get comfy…
So the second tournament of the year to be held in Mansfield rolled around at the newly renamed and renovated Slayer Games (previously Dreamlike Gaming) and it was to be a 1000 point tournament. This was comfortably the largest tournament of the year so far (the previous highest being 500 points) so it was interesting to see how the regular tournament goers would react. For my part it took me a while to decide what to take, on the one hand I was quite keen to develop the army I took to the Stockport tournament and continue my Battle of the Five Armies theme but on the other hand I had never tried 1000 points of my trusty Feral/Beserker (from here on out reffered to as Fererkers) heavy Isengard. Ultimately my decision was made by two factors, firstly, I didn’t have my Laketowners and Beorn painted up so didn’t have my ideal Battle of Five Armies ready but I also knew I was planning on taking that force to the next event (Throne of Skulls in June) and so it would be good to have a change. Most importantly, as mentioned above, I’ve never tried a 1000 point version of my Fererker list (even in a friendly game) and had long theorised it would do very well. The force had had most success at 750 points in the last season winning 10 out of 11 games on its way to a 1st place and a 2nd place at two events. I thought that expanding it to 1000 points should be relatively easy and leave me with a fairly competitive force. And so, that’s what I decided to do, I developed my 750 point list and built a very solid 1000 points of Ferals, Beserkers and Crossbowmen led by my traditional captains, and then I started to have doubts. I started to think about what other players would be bringing along and realised that almost everyone would have a wizard. This would then negate Saruman’s impact as the two wizards would become involved in a mutually neutering situation, with this in mind I decided I needed another anti-magic distraction and so I started to reconsider my list. I had been very impressed with the way The Witch King had shut down Gandalf through the combination of Channelled Sap Will and your Staff is Broken in the final game of Shadow and Sorcery (the last tournament I had attended) and so I decided to fit him into my force. I pondered the exact combination of his stats before settling on 3 Might, 14 Will and 2 Fate; with these stats he costs 115 points and so to fit him in I had to drop Mauhur, about 3 Beserkers and a Crossbowman. HIs 3 Might trumped that lost by Mauhur but another 4 models lost from an elite heavy army meant that I was going to be sorely short on numbers. However, I hoped that 14 Will would essentially give me 2 chances to Channel Sap Will and 2 chances to cast your Staff is Broken (on 3 dice each time) which should allow me to shut down one opposing wizard and possibly even two (should any of my opponents be so nefarious!). In addition, he would also give me another chance to cast Immobilise each turn which at 1000 points (where lots of big beasties were likely to be present) would be incredibly useful. With this big decision settled on (only 2 days before the event) I ended up with the following list:
Warband 1
Saruman on horse
4 Beserkers
4 Ferals
Warband 2
Armoured Shaman
3 Beserkers
5 Ferals
Warband 3
Armoured Shaman
3 Beserkers
5 Ferals
Warband 4
Vrasku
6 Crossbowmen
Warband 5
Lurtz
6 Crossbowmen
Warband 6
Grima
Warband 7
The Witch King of Angmar (3 Might, 14 Will, 2 Fate)
43 models
13 Might
Break point - 22
And so, with my army settled I set off on the long drive North, joined as ever by regular travel companions Tom Harrison and Sam Page. After a fairly uneventful journey we checked into our accommodation (which the wonderful Tom Macklen had very kindly sorted out for us all) where we dumped our bags and headed out to meet the others at about 9pm. I always feel like I’m flogging a dead horse when I say this but, as more and more tournaments pass, the community aspect just grows and grows and catching up with SBG friends really is one of the major reasons to head to these events. There was already quite a crowd in a local pub and we headed there for several drinks until closing at which point the less adventurous (read: smarter) members of the group headed home whilst about 8 of the move exuberant (read: idiots) decided to head out on the town and found some late night bar where we decided the most sensible idea would be to start getting shots in! Whilst almost certainly a mistake (given the early mornings and long days we had ahead) there’s no doubt that this fairly big night out was a whole lot of fun and ended in a somewhat unexpected after-party back at our hotel! I was sharing a large room with Tom Harrison, Sam Page and Mark Boyland and it was some time before we were able to get to sleep thanks to the exciting and entirely bizarre live wrestling show sponsored by the GBHL Youtube boys….
The sun rose far too early and we all headed down to breakfast, there were about 10 of us staying in the same hotel and there were some very sad looking faces hunched over their fry-ups! I was feeling pretty good though and after wolfing down a fry-up we headed to the brand new Slayer Gaming HQ. To give a bit of context I’d been along to the last Mansfield event in February (then called Dreamlike Gaming) and had had a cracking time; in the 2 months since that event Tom and the rest of his team had moved down the road into a new venue twice as large and umpteen times as impressive whilst changing their name to Slayer Games in the process. The new venue was absolutely incredible, essentially split into two halves, the first was their reception/cafe/shop with lots of model cabinets and shelf space showing off a range of merchandise from GW and other companies - lots to peruse and good to have a peek at some systems that you might not be familiar with. The second half was the venue’s gaming hall, containing about 15 6x4 tables covering a range of systems with 10 set up for us SBGers to battle across during the weekend. It really is a fantastic venue and so much better than the previous set-up (which was great!), massive congrats to Tom and all the guys at Slayer for such a great upgrade!
And so everyone arrived and I had my first of many cups of tea over the weekend (in real mugs, paid for on a tab, delivered to your table - CLASS!) and the first round draw was announced. I have to admit there was a whole lot of filth at this tournament - there were 19 players at the event and there were an awful lot of armies I really didn’t want to face, Sam Jeffery, Jamie Giblin and James Braund all had similar cheese-tastic Moria lists that I knew would be tough to face, Jay had his Laketown horde which had done so well at Stockport (now with added Gandalf, Saruman & Beorn!) James Baldwin had a Fererker heavy Isengard army very similar to my own and Ed Ball has his dreaded Fell Beasts which had got the better of me on 3 separate occasions at previous tournaments. There were lots of other worrying looking lists out there but these were the ones that I really didn’t want to face and, given the fact it would be a 6 game, Swiss-ranked event, I was bound to meet a few. In my mind Ed’s Fell Beasts were the favourites for the event and I remember saying to Jamie that whoever drew him at Reconnoitre would have to do the rest of us a favour by beating him as that scenario probably gave opposing armies the best chance.
Still, I managed to dodge any of these armies for my first round game as I was drawn against David Reid and his Wood Elves. I was pleased to get a game against David as he’s one of the Scottish players so can’t make it to all of the events, also despite having met him a few times, I’d never played against him before and was keen to get our head-to-head tally going! Whilst I hadn’t noted his army as one to worry about before the tournament, things soon changed as he set up his force, he had a LOTR era Wood Elf army consisting of Legolas, Rumil, Thranduil and a Stormcaller leading 48 Wood elves including a banner, 2 Sentinels and a few Galadhrim Court Guard. His archers were upgraded to be hitting on 2+ and he’d also allied in Gandalf the Grey for some magical support. It was a really tough list, it’s almost exactly the sort of list with which GBHL Jamie’s ‘Tournament Winning Wood Elves’ catch-phrase was earned and I’d played against it a fair bit in the past - I knew it would be tough. In Gandalf, Thranduil, a Stormcaller and Legolas, David had 4 incredibly frustrating models which I would need to attempt to shut down every turn - no easy task!
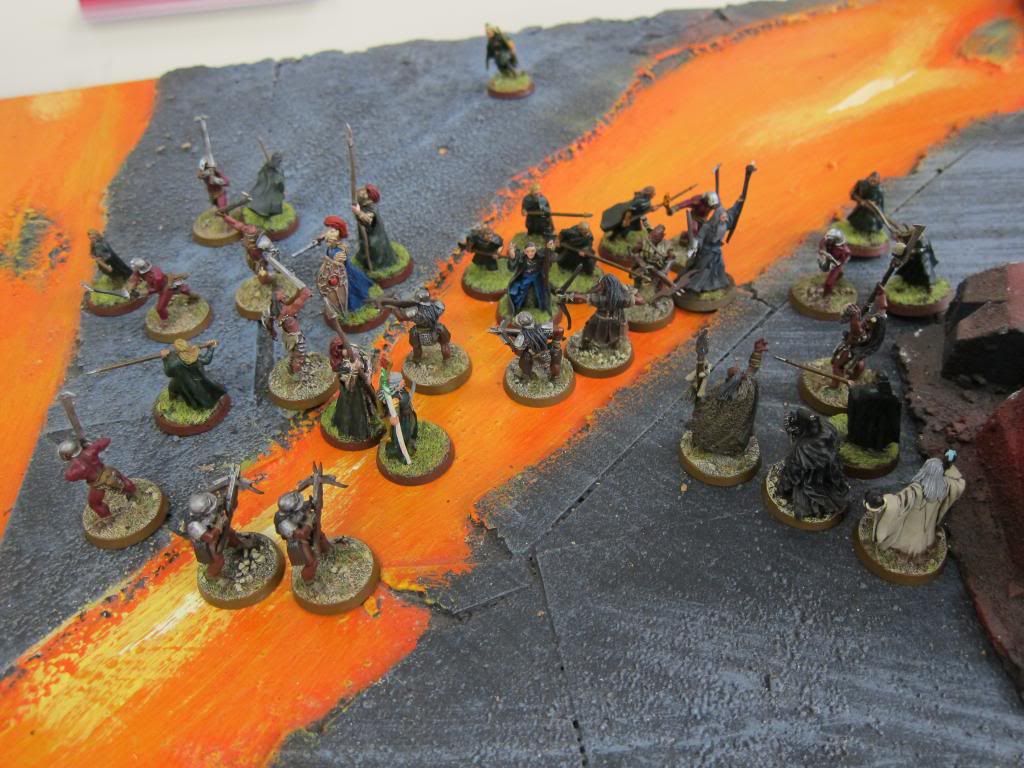
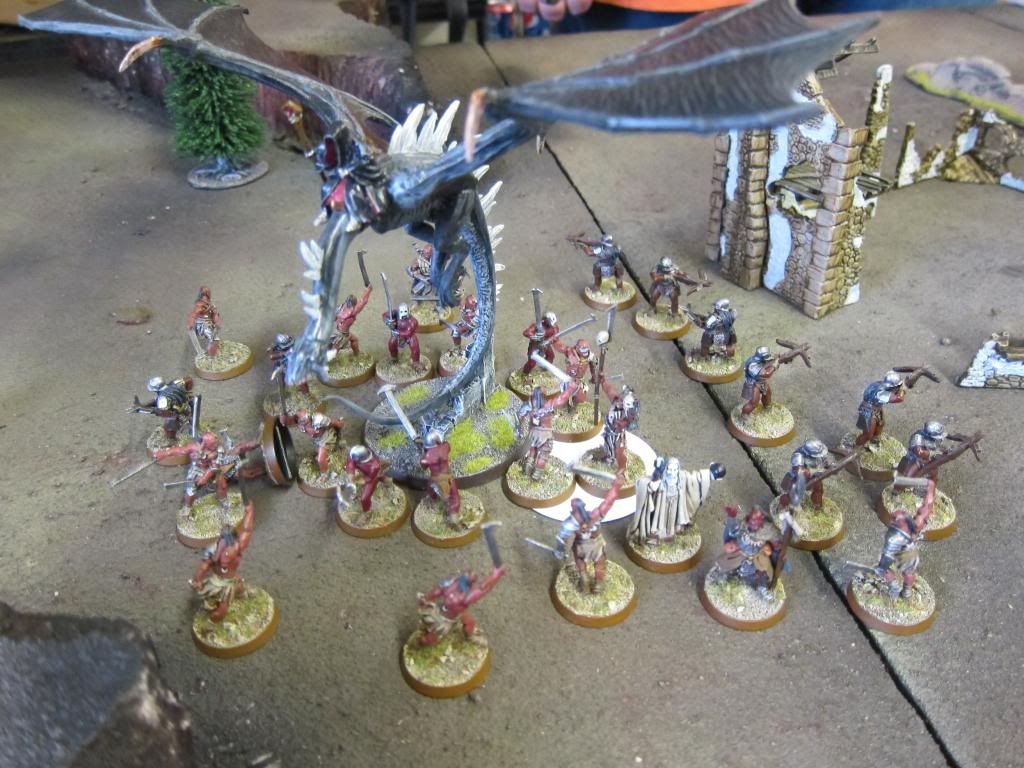
The scenario was To the Death and I quickly made up my mind that I would need to charge forward and be as aggressive as possible from the start. My biggest issue was the fact that David’s S3 shooting would rip through my D5 crossbowmen and Ferals and my own crossbowmen would find their shooting largely negated by Gandalf’s inevitable Blinding Light. David also had a banner so I was already essentially 2VPs down and would have to chase the game, finally his leader Legolas had an elven cloak and would likely be hiding at the back of his army making him very hard to get to. Still, I must admit I was quietly confident and thought this was a game I could win, assuming I could brave the hail of arrows (Channelled Fury would help there) then once I got into combat my 2 attack S4 models should be able to tear through the low defence elves. With all that in mind I set up close to David and charged forward, attempting to get to grips with him as fast as possible. Things started badly when I fluffed my Channelled Fury rolls (each shaman uses a point of Might to Channel and then uses 2 Will points to attempt to cast it needing a 3+ - the odds were with me), whilst my Shaman on the left successfully cast Fury, my Shaman on the right rolled snake eyes and left half of my line very susceptible to missile fire - and so it proved. As I rushed towards David’s army, his archers took a devastating tool on my force. David had about 20 S3 shots per turn and was able to fairly easy dispatch about 10 of my models (largely Ferals) before fighting began putting me at a significant disadvantage. However, once the armies did close I was able to swing the game back and over the course of 1 or 2 combat phases I was able to carve through the elves as planned and even the death toll at about 11 each. Saruman had got a couple of decent Sorcerous blasts off which had accounted for a few of the squishy Wood Elves and the Witch King had Sapped Will and broken Gandalf’s staff removing him as a threat from the game. On the downside Gandalf had killed Grima with a Sorcerous Blast before he could have any real affect on the game and David still had the advantage of numbers. As feared, my Witch King and Saruman were desperately trying to stop Gandafl/Thranduil/The Stormcaller doing their worst rather than trying to wound legals and unfortunately for me the game then took another big turn as Thranduil managed to cast a successful Nature’s Wrath and knock down a huge portion of my army.

Nature's Wrath causes havoc
Despite winning a fair few fights and standing back up, a great number of my models were swarmed by elves and I lost yet more models. I did get a brief bit of glory in this turn as Rumil and 3 elves all charged one crossbowman ready to Heroic Combat - I sent a volley of crossbow bolts into the combat and managed to kill my crossbowman (who would’ve died anyway) and all three elves leaving Rumil on his own and unable to call a Heroic - great stuff! At this point I was still desperately trying to chop through David’s army and get the win but, as the turns wore on and the time-limit approached, I realised that I was actually in a really bad position, we’d both broken each other so honours were even there but David still had a banner. That meant I had to kill the banner AND wound Legolas if I wanted to win and given that they were both skulking about at the back of the board protected by the remaining half of the elf army that would be no easy task. In addition, Saruman had used all of his Fate and so was dangerously close to being wounded and giving away VPs himself. As much as I probably should have hidden him to save the VPs I really needed his magic up front to try and break through the elf line. As is so often the case I was eventually able to gain the numbers advantage and start to swing around the elf line towards Legolas and the banner, I was getting the impression that if the game was played out to its conclusion then I might get the win but we were approaching the time limit and I was still losing 3-1 thanks to the damn banner. As we started the final turn I went all out for the banner in a desperate attempt to scrape a draw, thankfully Saruman’s magic came through for me and with one last Sorcerous Blast I sent the banner bearer flying backwards and killed him, levelling the score at 1-1 - I breathed a huge sigh of relief. Then, as David was moving his models, word came from the tournament organiser that the round was over and that it was dice down. To give you some idea of what this means, most tournaments play to a time limit (say 2 hours) and then once you hit the limit, you play to the end of the turn. In a dice-down event, as soon as time is called, the game ends whether you’re in the middle of a turn, a phase or even a fight - that’s it. I must admit I’m not a fan of the system as it can lead to a very unsatisfying feeling but that’s the way the organisers wanted their event to be so that’s the way we played it. We shook hands and attempted to make sense of everything that had happened over the last 2 and a half hours and it was only in chatting to David that I realised how lucky I’d been. Our game had ended in the move phase, Legolas could see Saruman (who had no Fate) and could elect to auto-hit him with Deadly Shot, he would need 5s to wound and Legolas still had 2 Might left; essentially, had we finished the turn then in the shoot phase David would have got to roll a single dice and on a 3+ he would have wounded Saruman and won the game. Similarly, if we hadn’t started the turn David would have won because of his banner, I only scraped a draw because the game finished in the middle of a turn - it seemed dice down had saved me in this occasion!
Final positions - note Leggy hiding at the back drawing a line on Saruman!
Still, as much as there was an annoyingly un-climactic feeling at the end, it had been a great game and David had been a great opponent. We both said that we were annoyed with the fact that the game deserved a climax and not with each other, David was a lot of fun to play against and played a really tough game. I had gone from going into the round thinking I should win to coming away pleased with barely scraping a draw and was reminded once agin how good the classic Wood Elves are when played well. I was also reminded how mentally draining 1000 point games of SBG are under the pressure of tournament conditions, thankfully we had a lunch break to get a bit of a breather before heading into round two.
And so I started my campaign in Mansfield with a draw, as much as I was lucky to get it it was still slightly frustrating given that I’d hoped to be competitive at this event and I knew it was now going to be a long up-hill struggle to place well. Lunch was great, the guys at Slayer had come around and taken our orders during the first game and they provided some fantastic hot breakfast style baguettes, very filling food and much needed after the trials of round one!
So, after wolfing down a sausage, bacon and egg bap I wandered to my next table to find I had been drawn against James Baldwin (Mertaal) and his Fererker Isengard force - Uh oh!

James’ Isengard army is very similar to my own and I’ve jokingly referred to him as my Padawan at various tournaments. James is a lovely bloke (and a phenomenal painter) I’ve got to know over the last couple of months and it was great to get my first game against him. I’ve also spent a very long time on The One Ring and Facebook giving him tips on how to do well with the Fererker list and how to use Saruman and Grima to their best! Suffice to say, as he set-up his army I was instantly regretting being so forthcoming with my advice! As I’ve mentioned, James’ army was very similar to mine with some subtle differences, he’d brought along Saruman and Grima, an Uruk-hai Shaman, 2 Uruk-Hai captains, 12 Ferals, 12 Beserkers, 12 Pikemen and 12 crossbowmen. He had a few more Beserkers than me, I had a few more Ferals but the big difference was numbers, he had 12 Pikemen whereas I had the Witch King and another shaman, hopefully my heroes should be able to make up for the loss of numbers.
The scenario was Domination and we set up the objectives in the standard 5 pip dice layout. Rather than being tempted by his 3 Might Heroes I placed Grima with James’ Shaman to prevent him Chaneling Fury whilst James placed his Grima alongside the Witch King. One benefit of this for me was that the Witch King was his own warband so I was able to deploy him (and so Grima) some distance from Saruman and my Lurtz/Vrasku to hopefully minimise his impact.
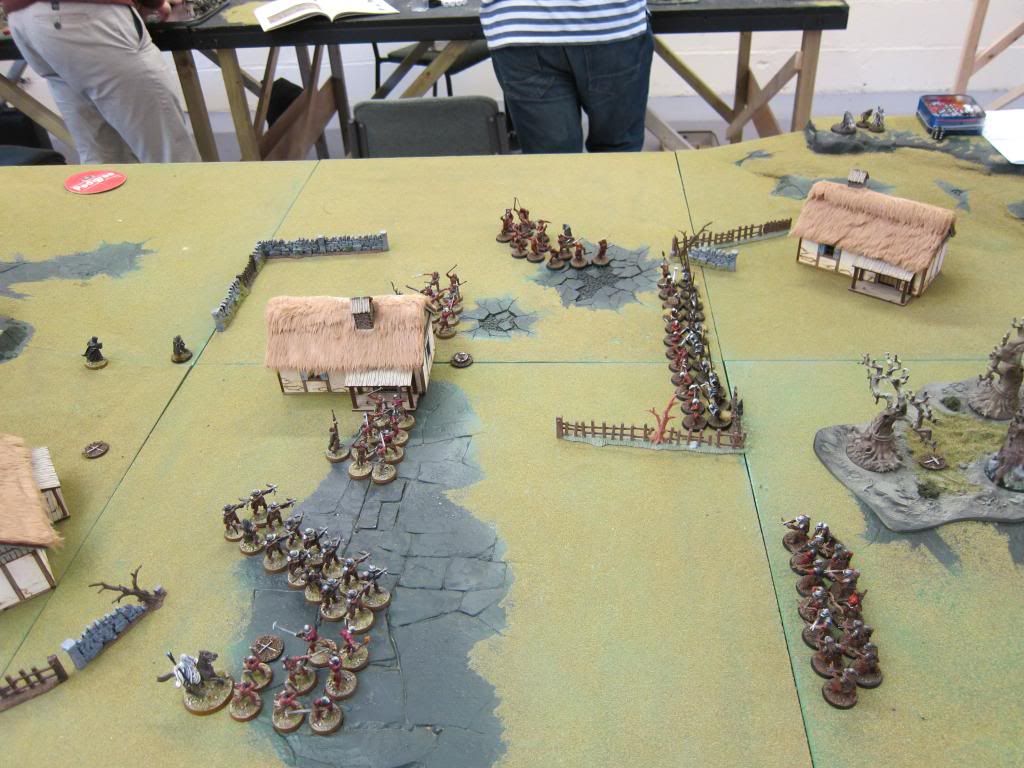
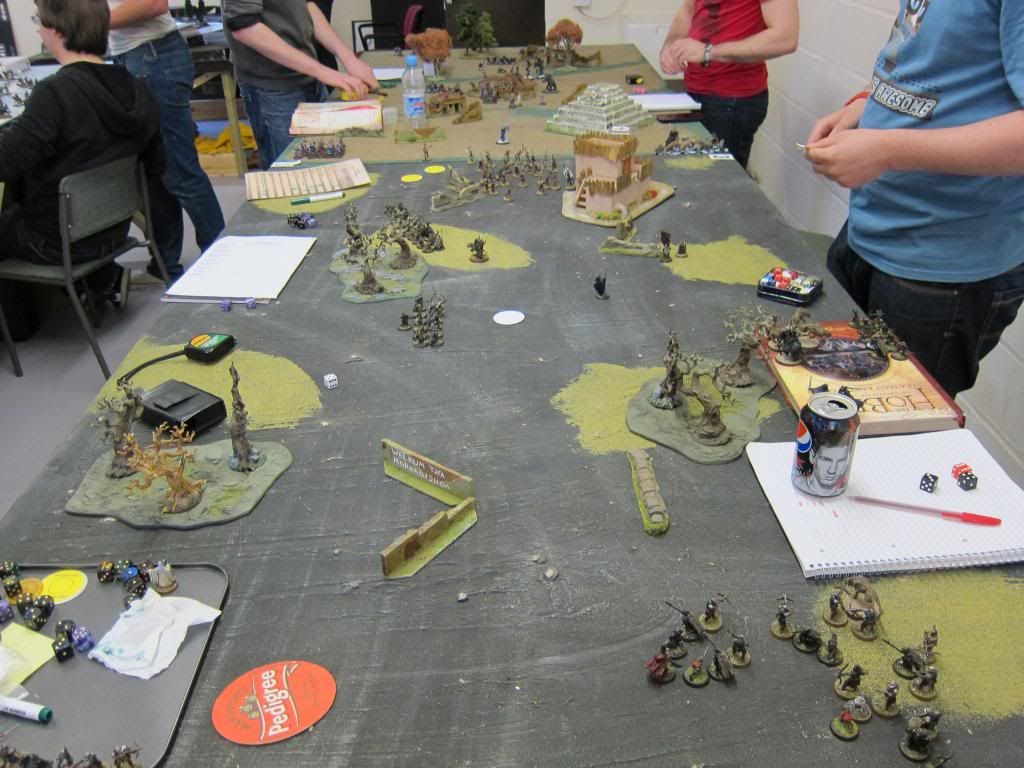
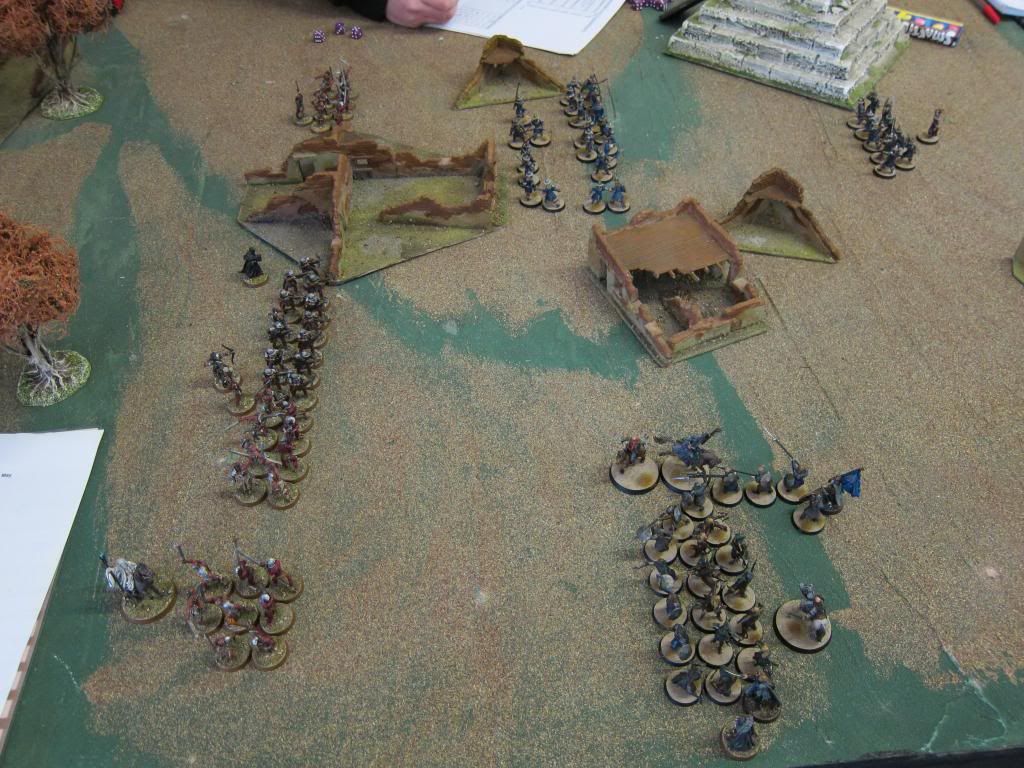
Deployment
You can see deployment in the picture above (and I’ll be referring to the picture throughout the bat-rep) and hopefully see my plan, I hoped to use my crossbows to thin out his crossbows and then Saruman and the Fererkers on the right flank would rush forward to hopefully wipe them out. I should then be in a nice curved position to surround and kill the rest of his army, incidentally if you’re wondering where James’ Saruman is he’s cowering behind the building at the top right, safe from my crossbows. The game started with yet another poor start as one of my shamans once more rolled snake eyes for Channelled Fury meaning half the army was suddenly vulnerable to James’ Crossbows. The Fererkers on the right charged forward towards the crossbowmen lining up to give Saruman 3 In The Way rolls from the opposing crossbowmen and line-up a wonderful Sorcerous Blast down the long lines of Uruk-Hai Pikemen in the centre (I targeted the pikes rather than the more dangerous Beserkers as I would need 5s to wound rather than 6s) and then let rip, blasting one pikeman into another 5. We then watched in wonder as I rolled the dice and not only killed the blasted model but ALL FIVE of the pikemen that were blasted into were killed too! 5 dice and 5 5+s - amazing! Suffice to say I was incredibly pleased with how that had gone but felt I needed to offer an embarrassed apology to James as he removed 6 of his models on turn 1 - that certainly helped with evening out the numbers! However, revenge was on the cards as James sent all 14 of his crossbow shots into Saruman and, despite the 3 ITW rolls, was able to kill his horse and force him to use all of his Fate Points and cause a wound! That certainly wasn’t in the script! In revenge I sent a volley from my own crossbowmen into his and was able to cut down a good few of them. Suffice to say we were both a little shaken by those exchanges in the first turn and had to rethink a little going forward. Seeing that my Fererkers were hugely outnumbered on the far side of the central house I started dropping them back, forcing James to funnel his far greater numbers through a smaller gap, he ended up sending his entire force after that warband around the far side of the house which bought me some time. James had his shaman there who had cast Fury normally (Grima preventing him Chanelling) but subsequently had his Will sapped by the Witch King (I think). My Grima was easily Sorcerous Blasted to death for the second game running whilst James’ Grima proved far more frustrating to take down, eventually drawing 4 Will and 2 Might from the Witch King before I successfully Black Darted him and removed the threat. I kept peppering James’ crossbowmen with my own crossbows, reducing them to Vrasku and about 4 Uruks before sending Saruman and his Fererkers to finish them off. I then planned to charge in and wipe them out but lost a crucial priority roll meaning that he got to pick the fights including putting his Vrasku on only one of my Fererkers whilst using another to charge Saruman and prevent him casting. James then called a Heroic Combat with Vrasku, knowing he planned to charge Saruman I had no choice but to call a Heroic Strike with Saruman to dissuade him (we would be tied on Fight value, James would have 4 attacks to my 1 and with only 2 wounds left James could easily kill Saruman!) I can’t honestly remember what happened in the ensuing fight, I think I won the combat based on my higher Fight value but suffice to say Saruman survived. Meanwhile, my small band of Fererkers who were retreating around the back of the house were doing an outstanding job of keeping the full force of James’ army at bay, gradually falling but taking a large number of James’ models down with them. My far smaller side was bolstered by Chanelled Fury and put up such a great defence that, by the time James’ force eventually came around the house, I had all my crossbowmen and about 10 Fererkers ready and waiting to face off against James’ vastly reduced forces. Still, things were far from decided thanks to the objectives. I was holding the one in the woods and by where Saruman deployed but James had one in his own deployment zone and was rushing over the central objective and the objective on the far left, in addition he’d wounded Saruman so things were really close. Thankfully, having all my crossbowmen alive at this stage in the game was not only unexpected by also hugely important. In one turn I sent a volley into James’ models holding the far left objective and reduced them from about 7 models to 3. Removing 4 models for no loss of my own was huge at this point in the game and allowed me to suddenly swarm back onto the objective and reclaim it. James was broken by this point and the presence of the Ringwraith helped no end with some failed courage tests. As the time limit approached I was able to secure the three lowest objectives in the picture and push into the middle and contest that one, denying James VPs. Finally, right at the death, The Witch King proved his worth for me and Immobilised Saruman meaning that James wouldn’t benefit from his huge Standfast; combined with the Witch King’s Harbinger of Evil this meant that a lot of James’ remaining models fled the field. I can’t quite remember the final score but I think it ended about 12-5 to me. In the end the VPs made it look like a big win but that really doesn’t get across how close it was, James played a brilliant game and really pushed me for the duration, a few dice here and there and things could have easily gone very differently. It was a great game against a great guy and I felt very fortunate to come away with a win. It was absolutely knackering again though and I felt very drained going into what would be a hell of a contest in round 3 when I was drawn against the Great Giblin himself - GBHL Jamie!
As mentioned at the start, I really didn’t want to face Jamie’s army, he had the Dwimmerlaik and the Shadowlord on horse, 2 Gundabad Blackshield shamans (Shatter = yuk), Groblog, 2 Moria goblin shamans, Gollum, full warbands of Gundabad Blackshields supported by Moria Goblin spearmen and 6 individual Fell Wargs as deployment drops. I’d played this sort of list before and it’s quite a popular tournament power build, as I mentioned at the start there were 3 variations on it at this tournament alone, also Jamie’s a damn good player and I knew this would be anything but easy. All that aside, I was delighted to get to play Jamie, despite going to all the tournaments together we’ve actually only ever played once, he’s a great guy and a good friend so I was chuffed to get another game against him, even if I thought he was going to smash me. The scenario was Hold Ground which gave me some hope, if I could split up his various goblin warbands and maybe isolate the Ringwraiths then I might be able to deal with small parts of his army individually without Jamie being able to form up that terrifying battle-line. However, right from the start lady luck was not with me, firstly I won Priority (you never want Priority in turn 1 of Hold Ground) and I then proceeded to roll appallingly for all my warbands, I think I only got to pick where 1 or 2 warbands deployed and had to burn 4 Might to get on the table in something approaching a decent place. As it was, Saruman, my shamans and all my Fererkers were deployed along one short edge (the tables were 6’x4’) whilst my Crossbowmen, Lurtz, Vrasku and The Witch King were 72 inches away along the opposite short edge. Still, if Jamie rolled poorly for his deployment I might still be able to isolate a few of his warbands and take an early advantage. Alas no, with his 6 Fell Wargs Jamie had 14 warbands and he rolled a positive result for 13 of those….I started to think it was going to be one of those games…
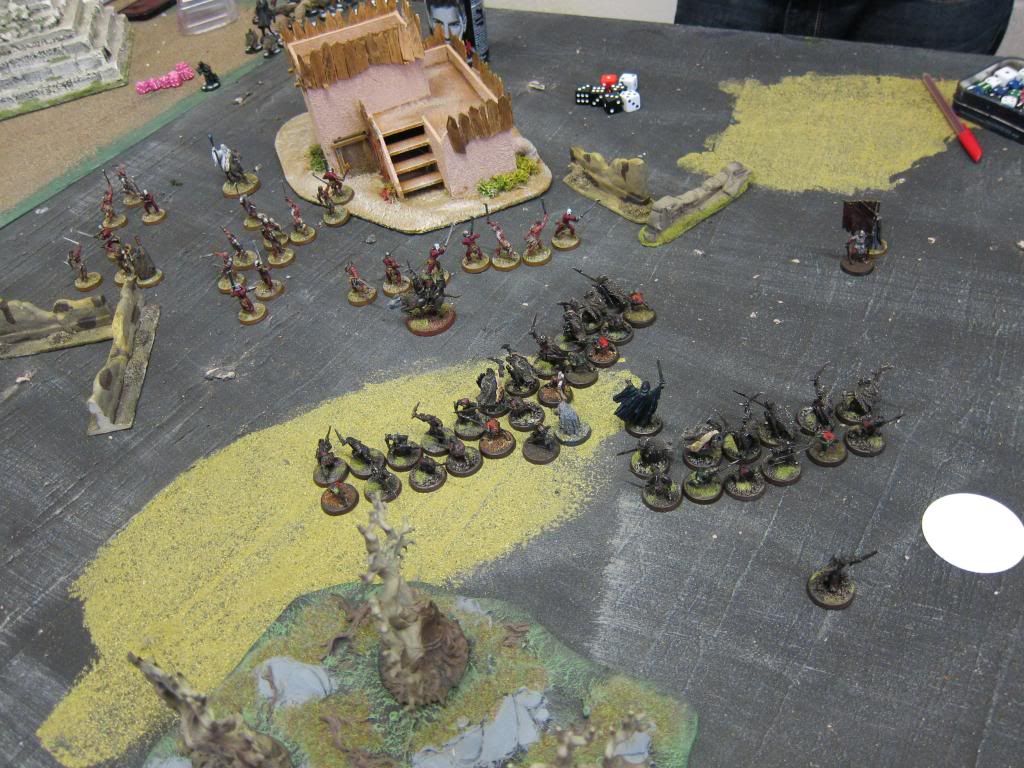
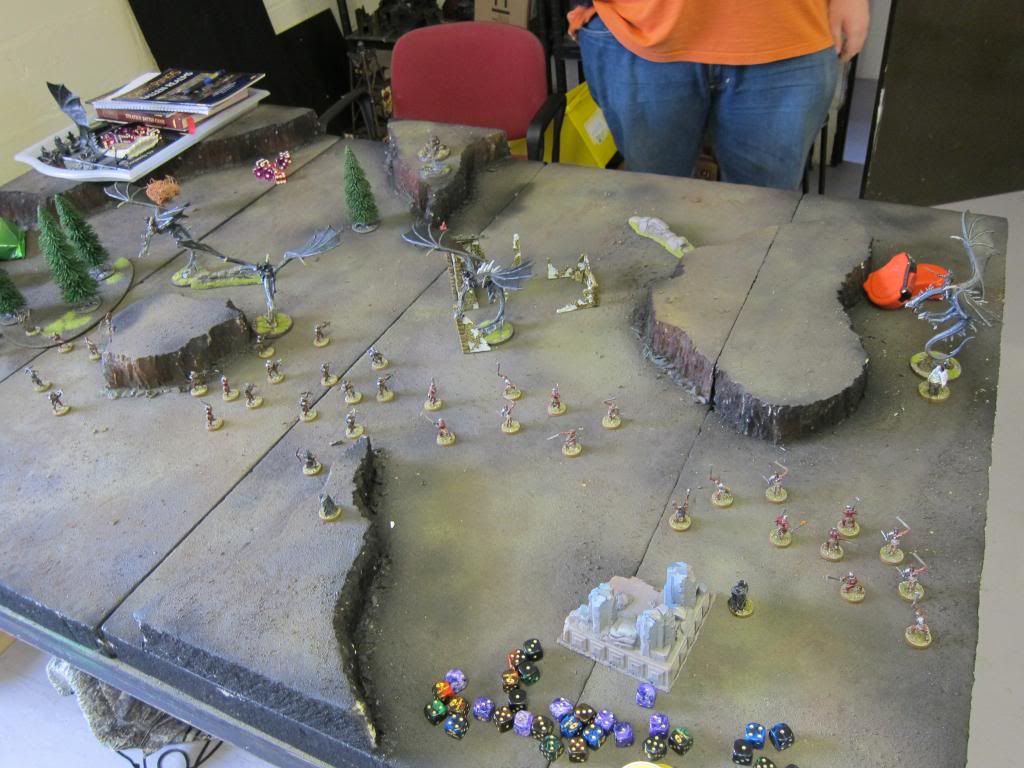
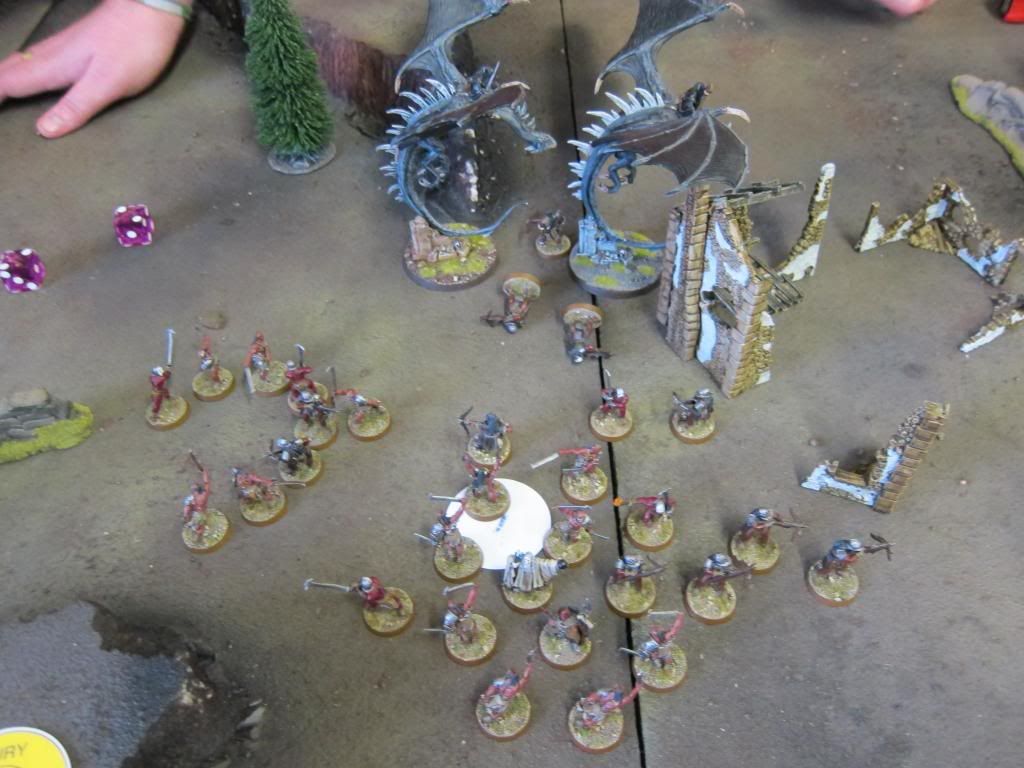
You can see the table after the first turn in the picture below, Saruman and all the Fererkers at the far end of the board whilst my crossbowmen get to grips with the wargs at the bottom of the picture, Groblog’s warband would join this fight in the next turn. Everyone’s a long way from the objective….
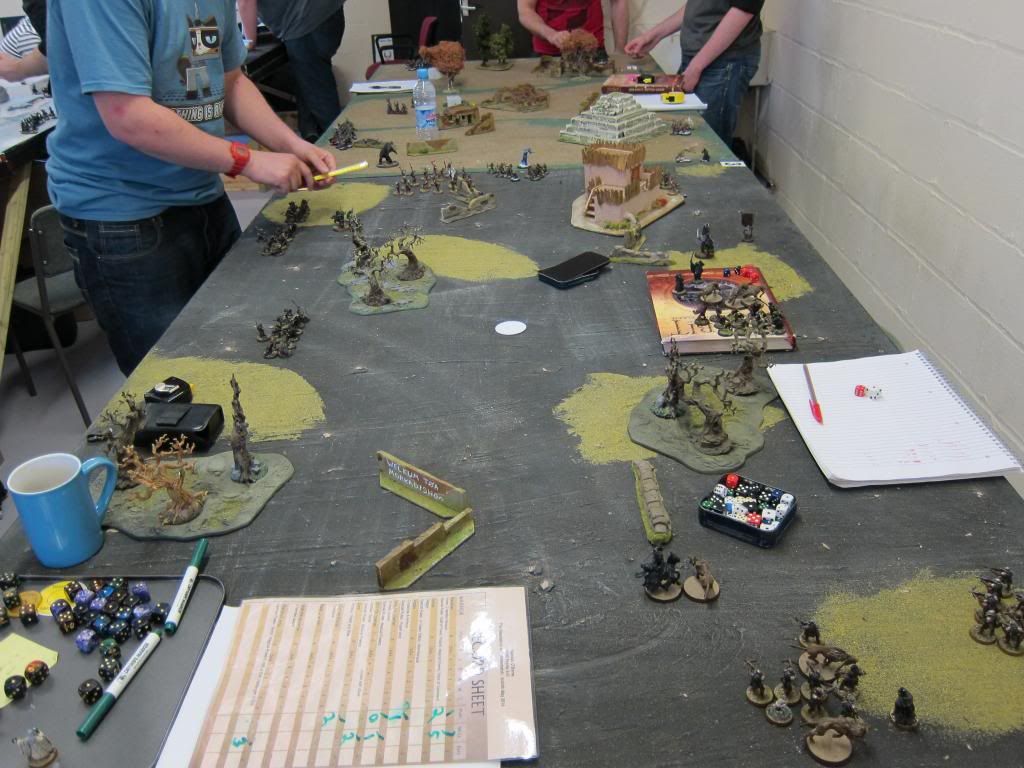
The White circle in the middle is the objective
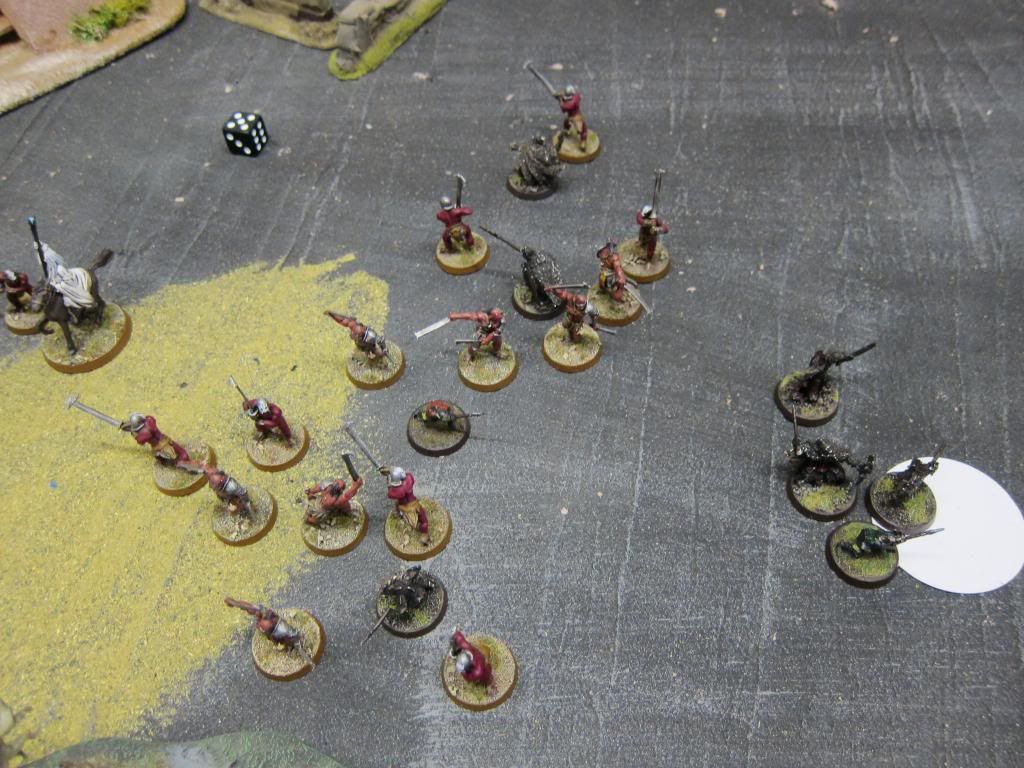
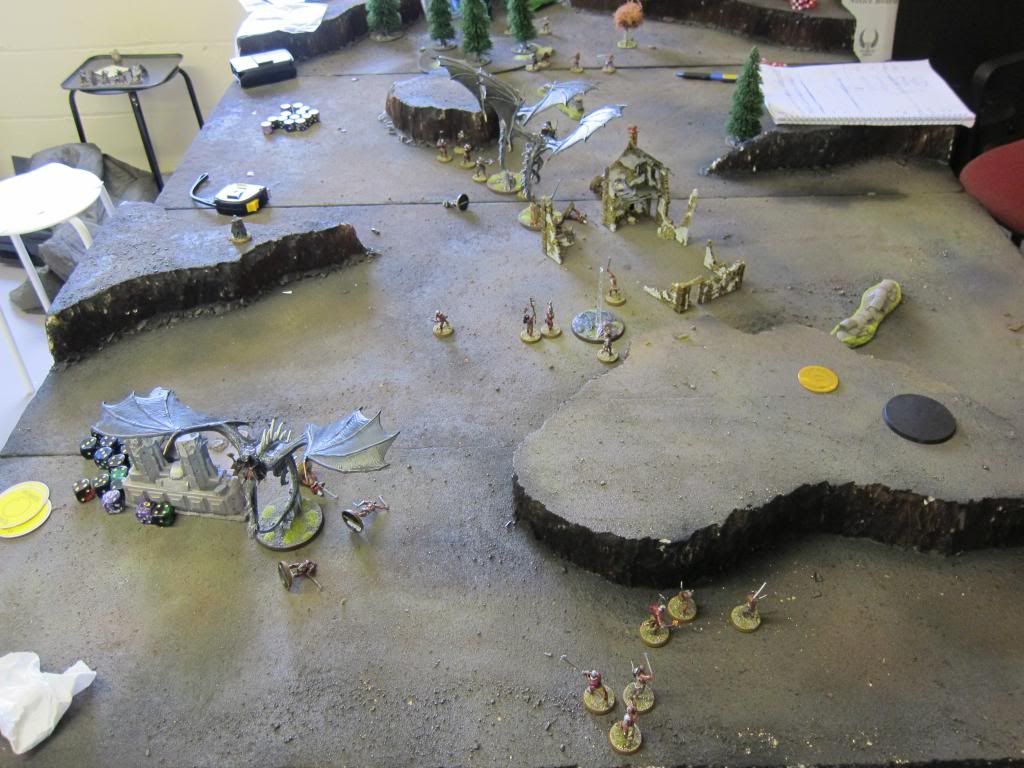
The first skirmish of the game involved Groblog, Gollum, The Dwimmerlaik, a few wargs and a warband of goblins against Lurtz, Vrasku, my crossbowmen and The Witch King. Over the course of a few turns Jamie won this first battle with Gollum (with the Ring and F5) proving incredibly useful in getting the better of Lurtz and Vrasku. I was able to take down a good few of the wargs and goblins but couldn’t get the important kill of Groblog so Jamie’s Fury remained at 5+ for the game. I was able to get rid of the Dwimmerlaik by Channelling Sap Will, the spell came off and Jamie was unable to resist it so the Dwimmerlaik vanished from the table. Unfortunately, the Dwimmerlaik’s effect meant that the Witch King had had to use double his planned Will and so he too vanished from the table. As much as it was a shame to lose the Witch King I was happy with the exchange as I thought the loss of the Dwimmerlaik was likely to cause Jamie more problems than the loss of the Witch King would to me.
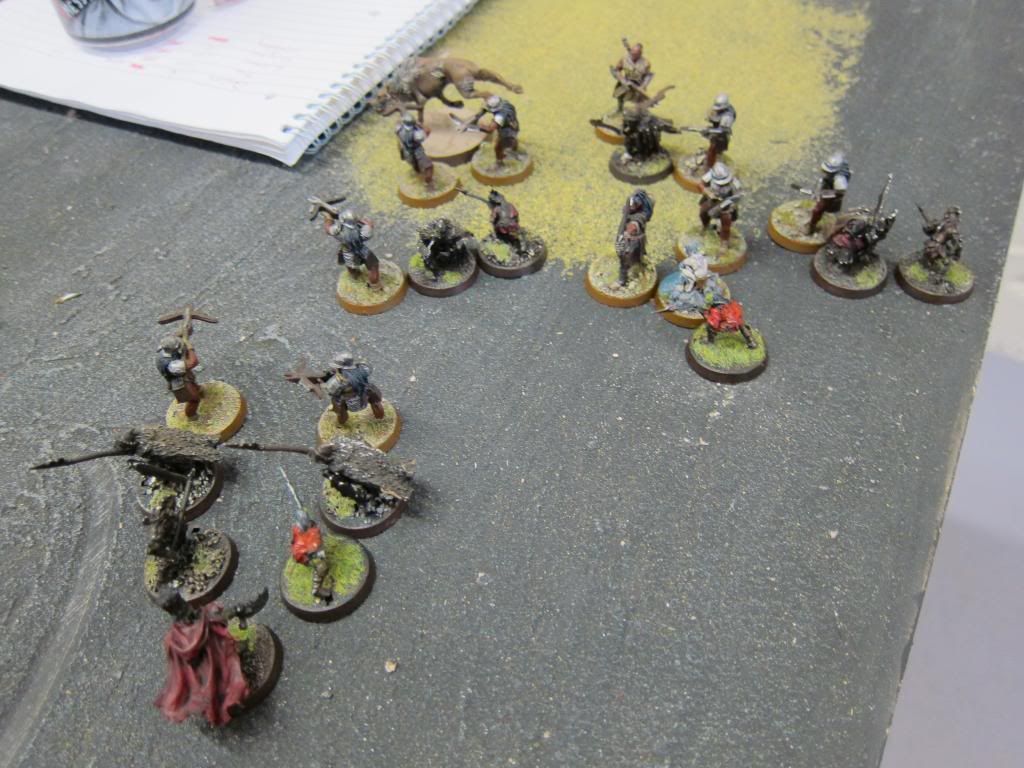
Groblog, Gollum and their minions take down Lurtz, Vrasku and the crossbowmen
Meanwhile, on the other side of the board, Saruman and all my Fererkers were bunched together and facing off against 1 of Jamie’s 4 goblin warbands, his Gundabad shamans tried to shatter Saruman’s staff 3 times but thankfully he either failed to cast it or I was able to resist. He did managed to get a Tremor off though that could have taken down loads of my troops but thankfully he only rolled 2” for the distance and it wasn’t enough to stop me overwhelming the warband and wipe them out.

The Fererkers wipe out one warband of goblins but there're plenty more where they came from!
With the early skirmishes dealt with, Jamie's goblins head for the central objective
We then entered the second stage of the game, Jamie’s remaining 3 goblin warbands had now formed up into an intimidating battle-line between me and the objective with the Shadowlord and a couple of shamans lurking behind keeping them in line. There wasn’t an awful lot of time left so I just sent Saruman and the Fererkers charging towards the centre to see what they could achieve. I didn’t rate my chances at all as there were about 30 of Jamie’s models between me and the objective and I would have to do a hell of a lot of damage before the game ended to win.
Jamie forms his battle line to protect the objective
Our lines soon clashed, Saruman was able to blast the Shadow Lord from the saddle and I struck Jamie’s battle-line hard. I outnumbered his front line so my Fererkers were able to start peeling around the edges of his line and strike his supporting spears. As always, the Ferekers performed admirably and started to cut the goblins down with gleeful abandon, somewhat unexpectedly I was able to break through the defensive line and kill most of them leaving only a warband of 12 or so goblins with a shaman on the objective. I decided it was a case of no guts no glory and charged Saruman into the Shadow Lord to make use of his Fight 5 and was chuffed to see my leader (with the help of a few friends) kill the wraith in combat! As we entered the dying stages of the game Jamie found himself broken but thanks to the shaman in the middle with channelled Fury this wasn’t a game changer for him. It did however mean that the game could now end and so as I crept ever closer to the objective we had to start rolling for the end of the game, if it had ended on the first two times we rolled the dice Jamie would have won but, thankfully for me, the game kept going! In the dying stages I called a Heroic Move and cast Compel on Jamie’s shaman and he, reasoning that he needed his Will point to keep Fury in play, allowed me to move him away from the army to where his Stand-fast wouldn’t affect the goblins. This proved an important move on my part as it meant several of his remaining goblins fled the field leaving only a handful of Jamie’s models on the objective. I know Jamie later regretted not calling a Heroic Move of his own to move his shaman and troops backwards and away from Saruman but I think at the time he thought he might need the Might for something else.
Against all the odds my Fererkers prove their worth by fighting through the goblin line and towards the objective
Thankfully, the game still didn’t end again and I was able to push forwards and bring my now superior numbers to bear on the objective. I think it was after the Move phase in this turn that time was finally called and we both started counting in a panic to see who had won. In the end I think it finished 9-8 to me, it was absolutely agonisingly close but I had just managed to scrape a win by the skin of my teeth. We were both absolutely knackered, we’d played solidly and intensely for the full two and a half hours and Jamie was understandably gutted to have lost by such a tiny margin, particularly given that if the game had ended at the first 3 times of asking he would have won. However, despite the disappointment Jamie was, as ever, not the slightest bit grumpy and we had a good chat about what an epic game it had been. I was thoroughly chuffed to have come through a game against a player as good at Jamie at a scenario in which I was the major underdog and it meant I finished day 1 on 2 wins, 1 draw and a massive high - it had been a good day!
And so with that it was time for the evening’s festivities! With the long games and tight schedule there was no time for some casual games like there had been at the last Slayer event which most gamers seemed rather thankful for. It’s a hard thing to describe but three, two and a half hour, 1000 point SBG games back-to-back is incredibly draining and really takes it out of you. It requires an awful lot of mental concentration to stay focused over such a long period of time and by the end of round 3 I think everyone was ready for some food and a beer! It was a relatively restrained night out by our recent standards and we all headed to the same curry house that had served us so well in February. It was great to see so many people come out for the night’s festivities (I think there was about 20) and it was yet another sign of how well the social aspect of our hobby is growing, we all settled down for a set meal of papadums, starters, curry, rice, nan, side dishes and desert all for £14 (I LOVE the frozen North!) and plenty of beers were quaffed - it was great but, despite staying there for a good few hours, we were all in agreement that that was all we were up for and travelled back to our various accommodation well stuffed and slightly merry.
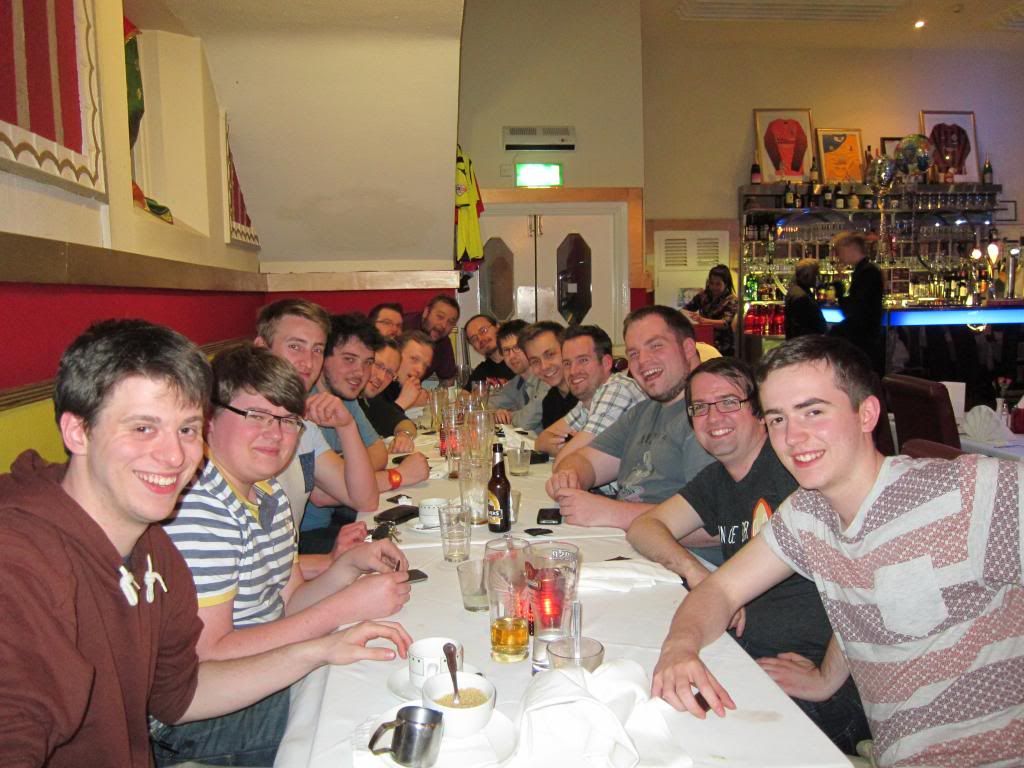
Curry and beer!
After another early start with breakfast at the hotel we were back at Slayer for the second day’s gaming. The first scenario of the day was Lords of Battle and all I could think about was don’t let me play Ed Ball’s Fell Beasts! Ed’s a great player and his Fell Beast army is rightly feared and, whilst I thought my army had the tools to put up a fight in the right situation, I knew that my chances were next to zero at this particular scenario. I would be frustrated to say the least to see my tournament chances ended by being drawn in a game that I likely couldn’t win. Thankfully, it seems fortune was shining upon me in Mansfield and I was instead drawn against Owen Wright on table 2 - Phew. Owen’s also a great player but at least I felt I had a fighting chance in this one, in fact, I actually fancied my chances. Owen had brought along a Battle of Five Armies themed list, liberally sprinkled with cheese. Owen had the Master of Laketown and a Laketown Captain leading a bunch of Laketown warriors, Legolas leading some Mirkwood Rangers, Dwalin on a pony leading some warriors of Erebor and…Alfrid, Bombur on a Pony and Gandalf on a horse - yep, it was THAT combo. Still, despite the cheese and potentially limitless Might, there were a lot of positives for me, namely his defence 3/4 elves and Laketowners. I knew that thanks to Gandalf’s Cast Blinding Light that my shooting would be all but useless so the only real option for me was to charge forward and try and tear Owen’s force apart in combat where my 2 attacks and S4 would hopefully be able to lay waste to his low defence models - would it work? We would see!
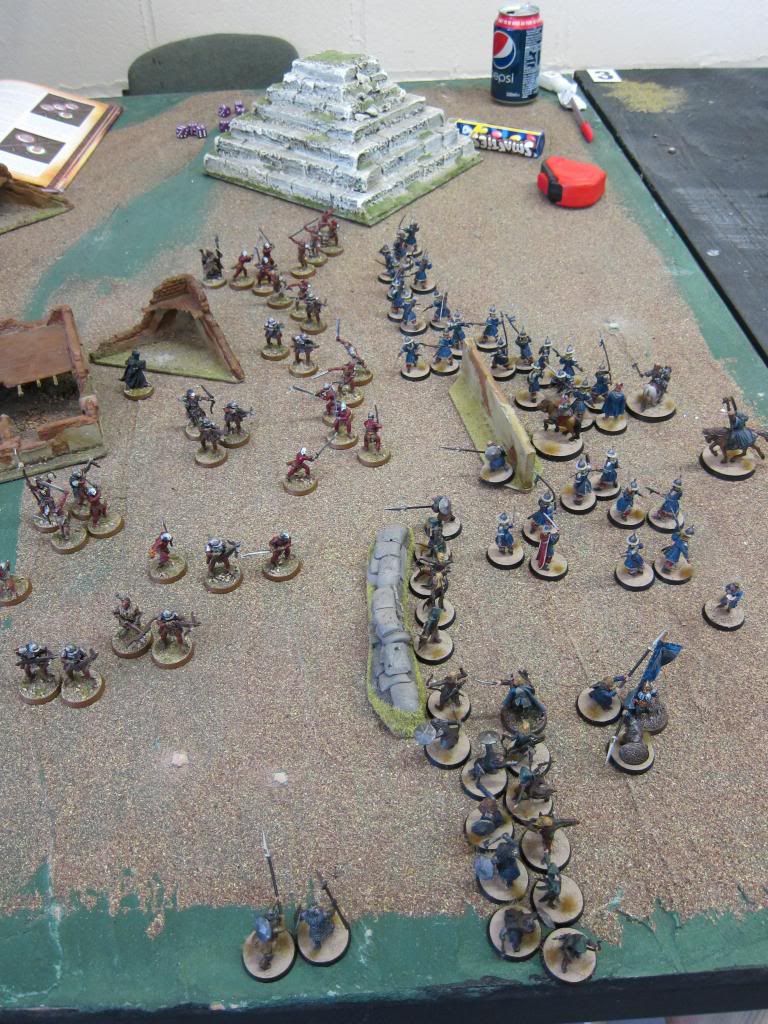
Deployment
The game started with me charging forward and slightly rearranging my models to match Owen’s deployment, he had his Laketowners on the far left, elves in the middle and dwarves on the right so I immediately started heading towards the left and centre to avoid the high defence dwarves. Owen was quite rightly standing off and shooting early on and managed to claim a good few kills against my lower defence Ferals and crossbowmen as I charged across the board. Somewhat predictably (and for the third game out of four) Grima was Sorcerous Blasted to death early on. I was incredibly cautious with Saruman and The Witch King due to the presence of Legolas and his Deadly Shot so they were creeping forward behind lots of cover, it wasn’t entirely successful though and Owen was able to kill Saruman’s horse, significantly reducing his manoeuvrability. This long slog across the board meant that we were actually quite deep into the game time when the lines clashed and I had a fair few kills to catch up on. I have to say the game look dmaazing at this stage with a horde of Fererkers running across the filed towards the well defended Good encampment - it was actually quite reminiscent of Rorke’s Drift!
Rorke's Drift anyone?
Thankfully, when the lines finally clashed I was able to get some good fortune when I noticed that Owen had moved all of his heroes more than 6” away from about 8 of his Laketown Guard and so I used the Palantir to automatically win priority. There was no way for Owen to counter this and so I was able to swarm his weakest troops with my Fererkers on the left flank and then quickly overwhelm them somewhat levelling the score. What then followed was several turns of desperate fighting across the full width of the board, I was gradually gaining the advantage thanks to all my extra attacks but Owen was making good use of spear support and the Master of Laketown’s rule to make his men F4 to even up the fights and I wasn’t cutting through Owen’s line quite as quickly as I would have hoped. By this point Owen had rearranged his lines and had both Bombur and Dwalin on ponies over on the left side ready to charge in and given him back the advantage. However, by winning priority for a few turns running I was able to charge his whole line and pin his warriors in place meaning that his mounted heroes had no way to get through to my models, when they eventually did the Witch King and Saruman (who had had very little impact on the game up to this point) were able to get in range and each Immobilise a dwarf hero per turn, removing their threat and allowing me to take them both down.
By this stage we were getting worryingly close to the end of the game and it was really close, the casualties had mounted up on both sides and it was very unclear who was winning (although I thought I was slightly ahead). This was another instance where the dice down ruling was a worry, we both wanted to carry on but we knew that the game would probably end this turn in the middle of a movement or a combat phase. I had Priority and if I had had the security of knowing there would have been a full turn of play, I would have calmly counted up the score and then, if I was winning, only charge into favourable combats and dropped back with the rest or, if I was losing, charged full on in with everything in an attempt to swing the game. As it was I had no idea if I was winning and so just threw all my models forward into combat without much thought hoping for the best. I can’t recall exactly when the game ended but I think it was before we got to the combat phase so at least we didn’t finish mid-phase, we shook hands with an exhausted smile and frantically started counting to see who had one. In the end it was another game that I managed to scrape through, I can’t recall exactly but I think it was something like 26-24 to me. Killing Dwalin and Bombur had obviously been a big swing for me (worth 8VPs) but the final VP score perfectly illustrated my point; as I was winning the game, and knowing that we had one more turn to play, the sensible tactic may well have been for me to just back away with everything to ensure that Owen couldn’t get those 2 crucial VPs. However, the stressful nature of dice down meant that I threw everything forward and potentially risked the game, thankfully of course it didn’t happen and indeed, the fights were very largely in my favour. In fact we finished the turn out of curiosity and there was an absolutely huge VP swing to me, by the end of the turn the VPs would have been something like 40-26 to me as I had finally managed to overwhelm Owen’s embattled defenders. I was obviously pleased to come through against a very tough opponent/army (even if I felt the dice down system had done me out of 14 crucial tie-break VPs) and Owen was a great opponent as always. Our armies were surprisingly well matched and right until the last turn it really good have gone either way. And so I marched on to game 5 on 3 wins and a draw and I think we can all guess who was waiting on table 1…
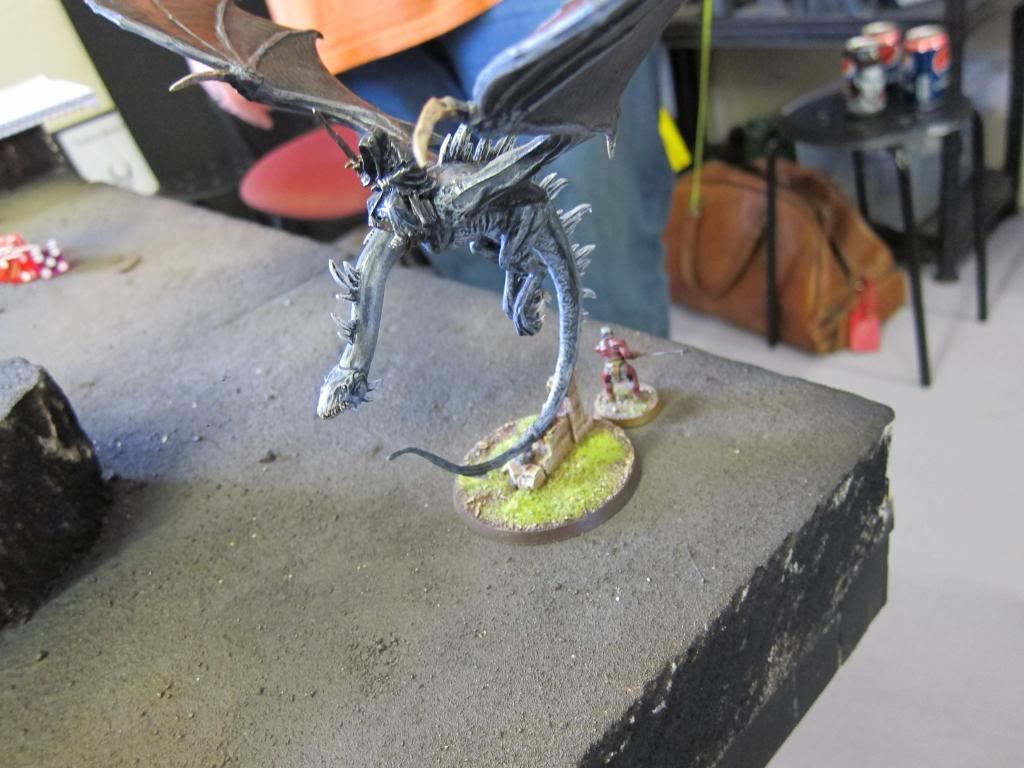
Yep, the time had come, Ed had beaten his opponent in game 4 and so I was to meet the great man and his Fell beast army in the penultimate game and the scenario was Reconnoitre. I suppose I’d brought this upon myself by saying at the start of the event that whoever drew Ed at Recon had the best chance of beating him - I certainly hadn't meant myself! We’d actually known the draw for game 4 (i.e. me V Owen) the night before and I’d realised that if I won this game I’d be playing Ed at Recon so I’d spent a lot of time thinking about how I might beat him. Ed had brought along The Knight of Umbar, The Undying, The Dark Marshall, Khamul and the Dwimmerlaik all on Fell Beasts and a Spider Queen - it was an extremely tough army and I had no doubt this was going to be hard. My strategy was simple, forget trying to kill the beasts and instead try and run past him. Ed could score a maximum of 12 points in this scenario (3 for breaking me, 3 for killing Saruman and 6 for each model he moved off the board) so I knew that if I could get 13 models off the table I would win the game. I’ve played Ed’s Fell Beasts three time before, once at doubles and twice at singles and he’s always come out on top. However, I’ve always thought that my army had the tools to beat Ed (2 attacks and strength 4 works fell against the D8 and D6 wraith and Fell Beasts and my high courage should ensure I get the charge) and I genuinely thought if I played smart I had a shot here. I had already decided that, unlike normal, I wouldn’t Channel Fury - there’s simply no point as Ed will SaP Will the Shamans once it’s up, essentially costing me 3 Will and a Might point. Instead, I would use the shamans’ Might points for Heroic Moves and cast Fury on a single dice at key turns when I needed to charge Ed, not for the 6+ save but to guarantee the charge and swamp him. This tactic also allowed me the option of throwing out a cheeky 5+ Transfix which, whilst unlikely to come off, would hopefully draw a few Will points from Ed.
My first play was a cheeky bit of gamesmanship to get inside Ed’s head, I assigned Grima to The Knight of Umbar, Ed moved the Knight onto the table, I moved Grima 3” on and 3” straight back off Ed’s table edge. Ed frowned, looked down as I walked back round the table and then smiled and shook my hand, it was devious and backhanded but I knew Grima wouldn’t last long near 5 Black Darts and he’d never be able to keep up with the Fell Beasts to use his rule so he was more use to me as a VP. 1-0 to me!
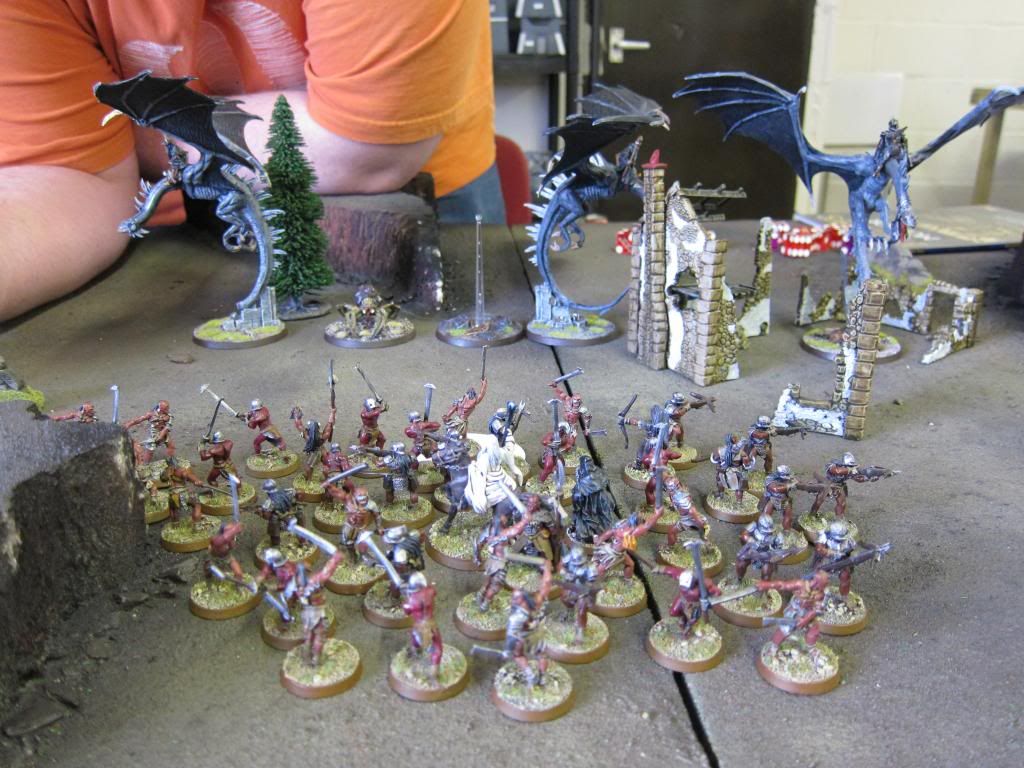
I got quite lucky with my deployment rolls (as I needed to) with all but one of my warbands getting onto the table and running straight forward in a long thin line across the board. The Fell Beasts are good on their own but their biggest strength is the synergy when they get together, my hope was that by splitting them up I would minimise their impact and give myself a chance to possibly get the jump on them. I was helped by Ed’s deployment rolls as he didn’t get the Spider Queen and Dwimmerlaik onto the table until turn 3, Their high movement obviously means it’s not a huge issue but it did mean that when the forces first clashed Ed only had 4 of his beasties for me to deal with. As we started turn 3 (ie the first turn where Ed could engage me) I put my plan into practice, I spread my line out into a staggered battle-line 3 models deep. The idea with this was to ensure that Ed still had to engage me across the full length of my line, it would also mean he could only charge two models per turn and, most crucially, it would mean that if he won combats and hurled my models that he wouldn’t be able to knock down too many models. Finally, Priority is HUGE against a Fell Beast army as if you charge them they can’t cast and they don’t get the charging bonus; by splitting the Ringwraiths up it would mean that if I won priority then he would have to call Heroic Moves with all 5 wraiths to get the charge, burning through his limited Might
My battle line forms up to hopefully absorb the impact of the Fell Beasts - note Saruman suicidally pegging it down the flank like a maniac!
You can also see in the photo that I sent Saruman on his horse bombing it down the right flank without any protection, suffice to say recklessly throwing my most powerful model (who was worth 3VPs) forward baffled Ed no-end but I thought it was the kind of aggressive and unexpected tactics I’d need to use against Ed in order to beat him. My thinking was simple, anyone who’s played the Fell Beast army will know that it’s ridiculously easy for Ed to kill heroes, he was also my quickest model and, considering he was worth 3 VPs, Ed wouldn’t want to let him escape off the board. I decided that if I sent him running down the flank then Ed would have no choice but to go after him, that meant there was one less Fell Beast attacking my line and, who knows, with Saruman’s F5 and 3 Might he might even cause a bit of an upset if he managed to get the charge. AND CHARGE I DID! On the way in I threw all 6 of Saruman’s Will at one Sorcerous Blast - again, Ed looked at me in confusion but this decision was based on simple experience, Sorcerous Blast is a great way of dismounting Ringwraiths (at which point the Fell Beast flees the table, hugely reducing their impact) and I needed it to come off. Sure I might cast it on 2 or 3 dice but throwing all 6 dice all but guaranteed me a high casting roll drawing more of Ed’s precious Will to resist it. Finally even if he did cast it on a 6 on 3 dice, there was no doubt in my mind that Ed would then Sap Will on Saruman in his turn, wasting my Will anyway, I thought it far better to guarantee one huge spell and force Ed to waste Will resisting. With a manic grin I threw all 6 dice and got the 6 I needed, as hoped, this forced Ed to think carefully about what he used to resist, I can’t recall exactly but he used 4 or 5 Will and resisted it, possibly with the help of a Might point, an exchange I was more than willing to take. Unfortunately Saruman lost the fight and was Rended, I think he survived the first round of combat but the next turn the KOU jumped back on him and killed him. It was a shame of course but Saruman had served his purpose, drawing a good amount of Will from the KOU and allowing my troops on the right flank to push up the board unimpeded.
Meanwhile, across the board things were also going well, I had won priority forcing Ed to call a couple of Heroic Moves with his 3 other Fell beasts to keep them safe and I’d possibly even won the roll-offs (it’s really hard to remember details of this kind of game as there’s so many Heroic Actions called) I think I lost most of the combats but having not charged, the Fell Beasts were unable to do too much damage. I think it was the next turn where I was able to get 4 of the Fell Beasts trapped by 3 or 4 Fererkers each, they were already running low on Might and I realised that there was half decent chance that I could kill all 4 on one turn! Meanwhile, a lot of my other troops (including the low courage crossbowmen who had little chance of charging the Wraiths) were running past the Fell Beasts and making for the board edge. Unfortunately I wasn’t able to kill any of them in that turn although I did do well, taking away a few Fate points and drawing yet more Might. The next couple of turns brought more of the same, I either won priority and/or burnt Might to call Heroic Moves and get the charge on the Fell Beats and after a few turns of fighting things started to tip in my favour, the Fell Beasts are at real risk without Might when charged and 3 or 4 feinting Fererkers charging in gave me 8 attacks needing 6s re-rolling 1s and allowed me to take a couple of them out of the game!
With the first Fell Beast down, most of my models make a break for the table edge whilst a few stay back to try and keep the wraiths busy
I think Khamul and the Knight of Umbar were the first to go and, a turn or two later, I was also able to rid myself of The Dwimmerlaik (I think, I find it very hard to remember who’s who)! I couldn’t believe how well it was going but I still had to be careful, I was yet to move off the board and knew I couldn’t reduce Ed to 25% (i.e. 1 model) before I had enough models off the board or the game would end in a victory to Ed. With that in mind I stopped trying to kill the wraiths and, over the course of the next few turns, my models finally started running off the board, racking up the VPs I needed. Of course, by this point having unexpectedly killed 4 of the wraiths I now needed less models off as Ed could only score a maximum of 8 (although this was further complicated by the Spider Queen sprouting 3 bases of broodlings). Thankfully, Ed was now broken and the broodlings were either killed by my last few models left on the table or failed their courage tests, the Spider Queen managed to run off the table giving Ed a VP leaving Ed’s last model (The Undying on Fell Beast) facing off against my last Beserker who he had caught 1” away from Ed’s table edge. We then entered quite a comical final few turns as the Fell Beast would charge the Beserker, win the fight and Hurl him back towards my table edge, Ed had vowed to take him all the way and throw him back off my own edge but, unfortunately for everyone, the impact hit for Hurl finally killed the Beserker about 18” away from Ed’s edge, removing my last model from the table. We then simply had to measure how far Ed was from my table edge and ensure that he passed enough courage tests for being broken to move off the table, which he did.
The last Beserker is caught an inch form victory...
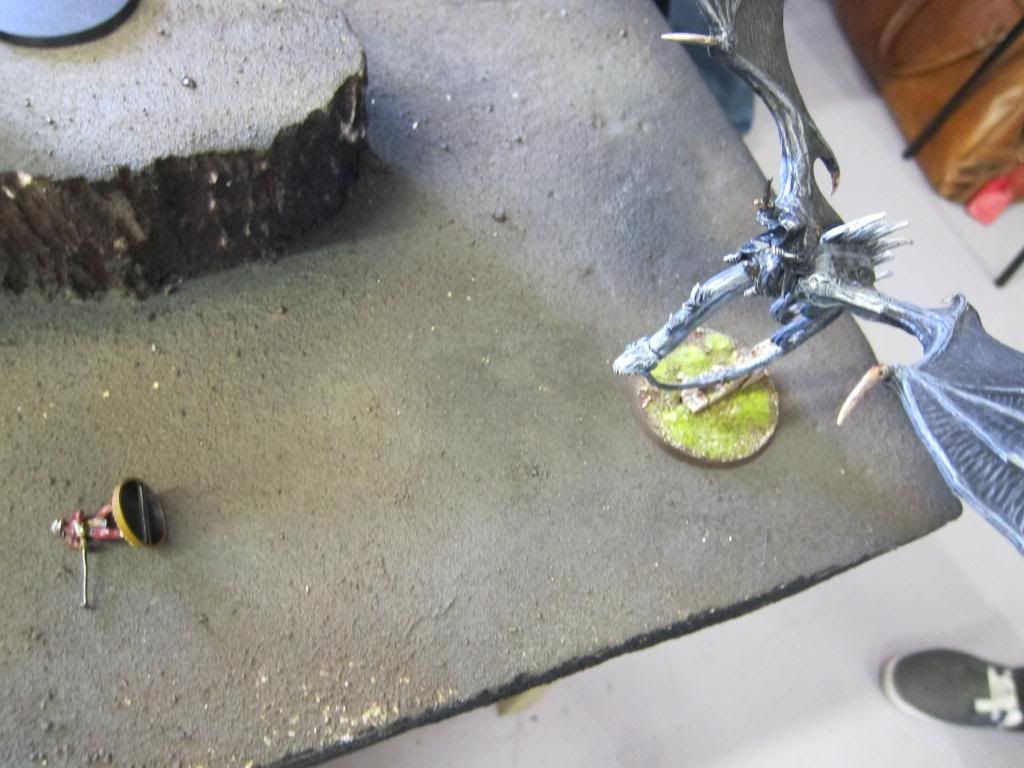
And then tossed about a bit until he dies.
Counting the cost the game had ended in something like a 16-5/8 victory to me (I can’t remember if Ed broke me); I was absolutely over the moon, not simply because of what it meant for the tournament but also because I had finally got a victory against Ed’s dreaded Fell Beasts. I was thoroughly chuffed my my performance, I thought I’d come up with a really good plan and played the game well. Ed was a great opponent throughout, the game was incredibly tense, exciting and tactical and I ended up giving Ed my most sporting/favourite opponent vote (in a tournament where any of my opponents could have won it) as a result. So that was that, 4 wins and a draw and I marched on to the final round of the tournament to decide the winner where I would face…Ed Ball!
 Top
Top


 .
.