Hello everyone!
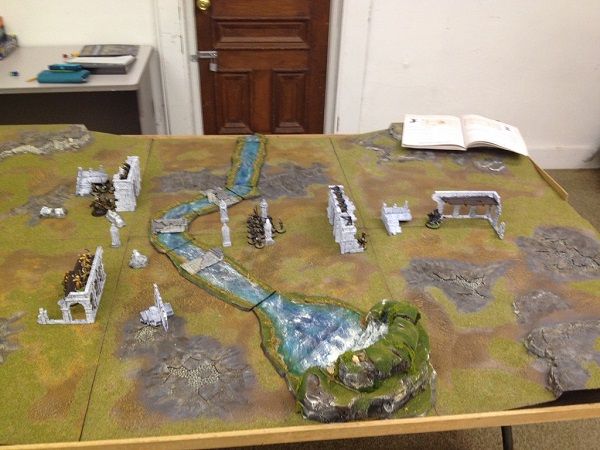
My wife and I went to our local gaming store here in Lebanon, Indiana to play our first game on a real gaming table and not the kitchen table with rocks and model trees scattered about. My wife set up the terrain for our game while I prepared the armies for pictures. The shop owner gave us permission to take pictures and post them for a battle report. This is also my wife’s first game playing with the new Hobbit special strikes and her first time using a wizard! (Wow, I bit off more than I can chew with this game.)
I want to throw up a disclaimer here and let you all know this is my first time making a battle report. I would love to hear your feedback or praise on what I do well and what I could improve for next time. Now, having said that, I did realize that after I got home and loaded my pictures onto my computer that I basically took the same shot the entire game and never got any really good up-close action shots. I apologize for this and will work to improve that in future reports.
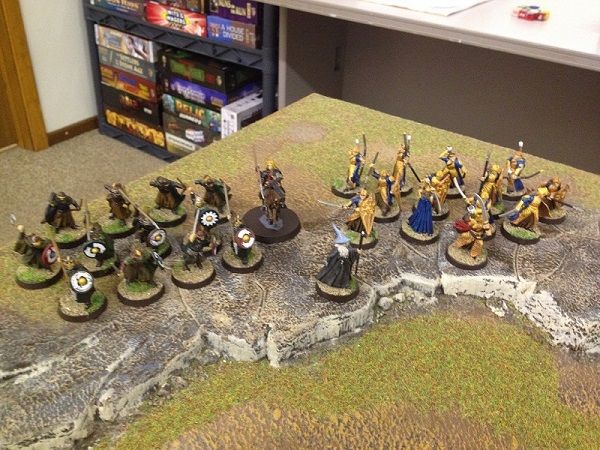
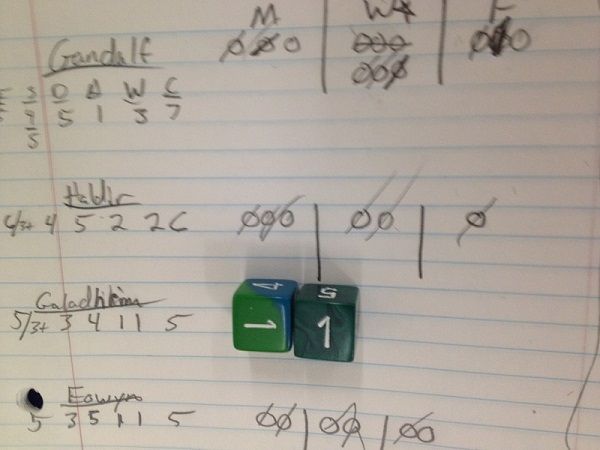
Leader: Gandalf the Grey
Warband 1: Haldir, Defender of Helms Deep
2x Galadhrim with sword
2x Galadhrim with Shield
4x Galadhrim with spear and shield
4x Galadhrim with elf bow
Warband 2: Eowyn with armor, shield and horse
3x Warriors of Rohan with shield
5x Warriors of Rohan with throwing spear and shield
4x Warriors of Rohan with bow
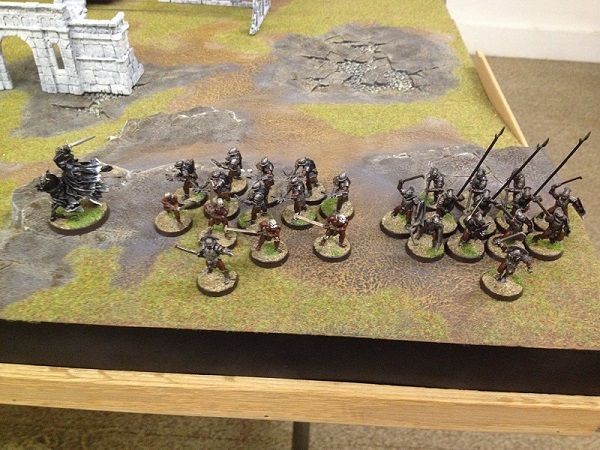
Leader: Dwimmerlaik on horse
Warband 1: Uruk-hai Captain with heavy armor
6x Uruk-hai Warriors with shield
6x Uruk-hai Warriors with pike
Warband 2: Uruk-hai Captain with heavy armor
8x Uruk-hai Warriors with crossbow
4x Berserkers
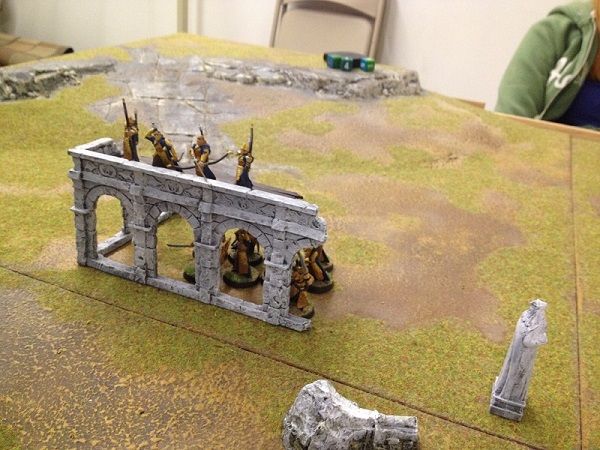
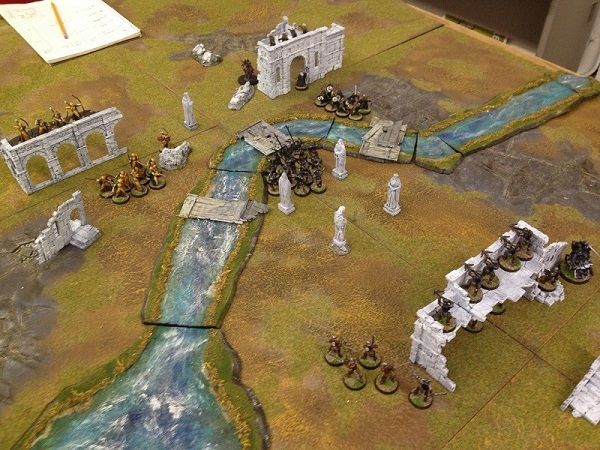
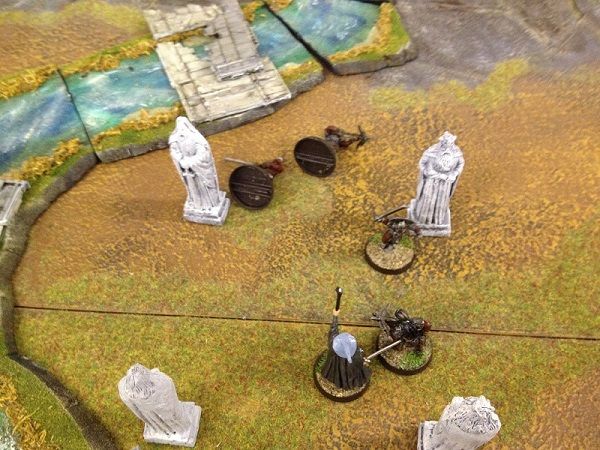
I rolled for the scenario after we set up the table and we got The High Ground. We decided to just play it with the board we had set up but without a hill in the middle. We just used a square of statues to represent that area. Evil won the set up roll and placed the warband with the crossbows first, which rolled up close and were placed in the ruins to have a good vantage point. Good proceeded the place the Rohan warband first which also placed close and in one of the ruins. The other Uruk-hai warband was next and came on right on their side of the objective. The good followed up with the Galadhrim warband which was placed in the other set of ruins on the good side of the table.
Finally, the Dwimmerlaik rolled away and was placed as close as he could behind the Uruk-hai crossbows. Lastly, for Good, Gandalf rolled and joined the Rohan warband in their fortification.
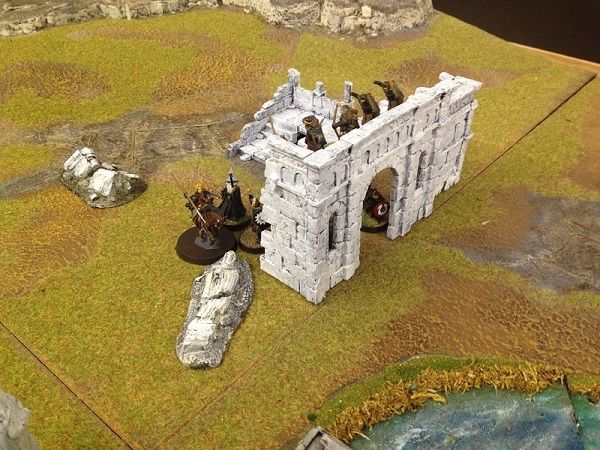
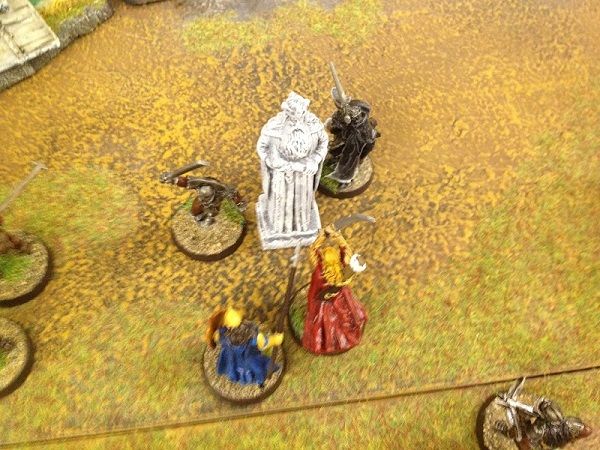
The weather is calm. The grunts and roars from the Uruk-hai can be heard over the battlefield and the piercing shriek of the Nazgul strike fear into the forces of good. The Uruk-hai, pressing their advantage, move up to take the middle bridge and prevent the forces of good from accessing their side of the river. The berserkers, followed by a captain, run up to position themselves to fight Haldir and his band of Galadhrim. Gandalf lights up the battlefield with the blinding light emitting from his staff as both he and Haldir call out commands to the troops near them to push forward toward the side bridges to flank their enemy.
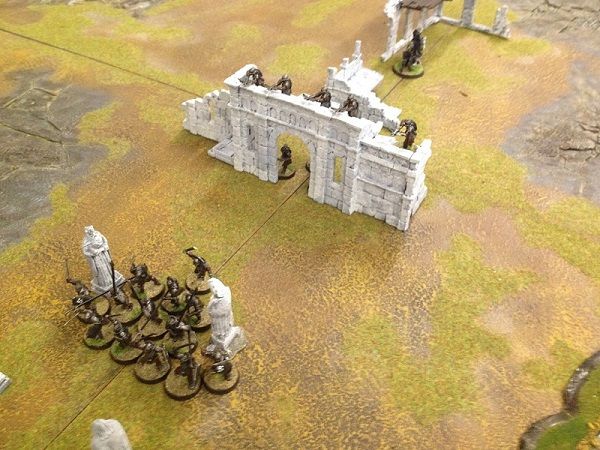
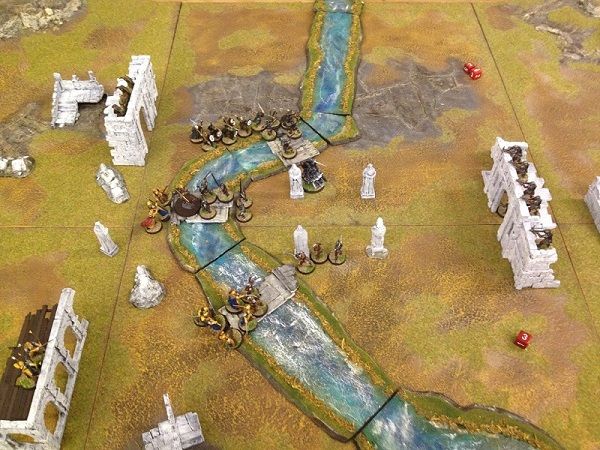
The Uruk-hai let loose a volley of crossbow bolts into the oncoming elves and take down the foremost elven swordsman. The others cower behind their shields. The Rohan archers returned fire, but the Uruk-hai have already taken cover behind the walls. Haldir calls for a volley down into the Uruk-hai formation across the river and an arrow takes down the nearest Uruk-hai pikeman. The Warriors of Rohan throw a volley of spears into the ranks of the Uruk-hai, but to no effect.
The Uruk-hai continue to push up the middle to the far side of the bridge, hoping to come around behind the good forces. The Nazgul rides forward to drain Gandalf of half of his will and he is unable to resist the spell’s power. As the elven archers take aim at the approaching Uruk-hai, a volley from the Uruk-hai crossbows send 2 of the elven archers to their deaths at the bottom of the ruins. The remaining 2 archers take cover from the bolts, but then miss their shots. Rohan turns all of their ranged power towards the Uruk-hai on the bridge. 3 Uruk-hai pikemen die to the volley, then one of the pikemen lets out a whelp before falling off the bridge into the water with a spear of Rohan through his chest.
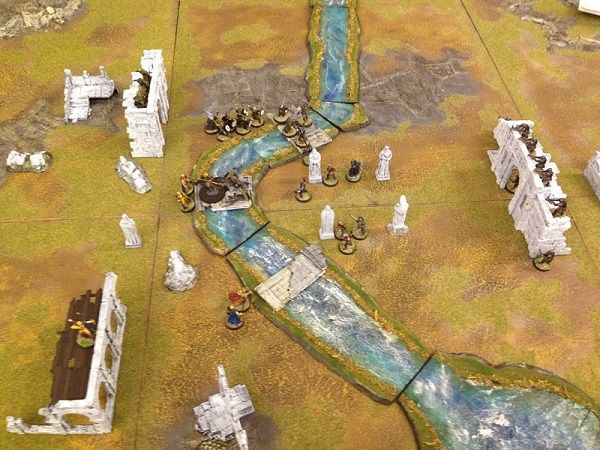
The 3 heroes of good converge on the Uruk-hai crossing the middle bridge. Haldir makes quick work of the Uruk-hai challenging him, but Eowyn and Gandalf struggle against their foes, Gandalf barely escaping a grievous wound.
The Uruk-hai regroup in the center of the middle bridge as their comrades rush onto the side bridges to try to prevent the forces of good from surrounding them. The Galadhrim and Warriors of Rohan press forward onto the side bridges to meet their foes as Eowyn charges her horse into the Uruks on the middle bridge, supported by her elven allies. Gandalf regroups and easily shrugs off the bombardment of the Nazgul as he runs to support the Rohan warriors attacking the side bridge.
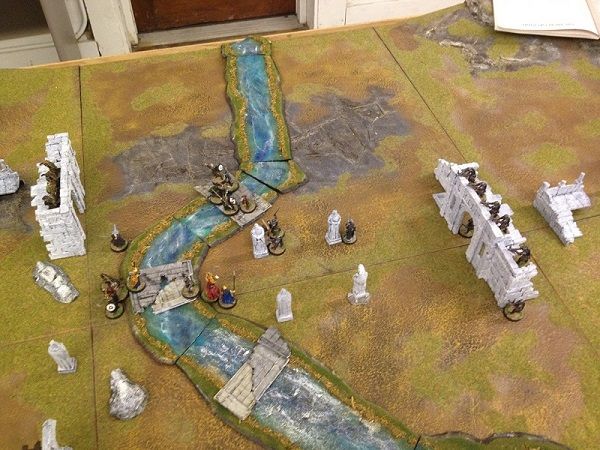
The archers of Rohan let loose a volley at the Nazgul, which connects with his horse. The fearsome beast rears, throwing his rider, then falling to the ground, dead. The Nazgul lets out a screech, but lands on his feet, and leaves the Rohan archers in a state of uneasy satisfaction. Eowyn’s charge knocks down the Uruk-hai on the bridge but they manage to crawl away from being trampled. Meanwhile, the forces on both side bridges struggle to gain the upper hand on their opponents, though neither can gain much ground.
The Uruk-hai charge back into their opponents with renewed vigor while the Dwimmerlaik continues to struggle in the battle of wills with the Grey Wizard. The assault from the Rohan throwing spears continues to be too much for the Uruk-hai pikemen to avoid and another pikeman goes down. But the Uruk-hai crossbows continue to take their toll on the Galadhrim archers as well and a third falls to the next rain of bolt fire. The berserkers push back the elves on their bridge killing one swordsman. The charging Uruk-hai on the middle bridge maneuver Eoywn into a near scrape with death from the last remaining pikemen.
The elves push back into the berserkers, seeking to avenge their fellow, but they only find more sorrow and rage as 2 more fall to the savage Uruk-hai. Eoywn charges down the Uruk-hai on the middle bridge again and although they brace for the charge, the two nearest nearly fall off the bridge from the impact. The Uruk-hai captain, dazed by a spell from the grey wizard, and his Uruks continue to struggle against the number of Rohan warriors charging the bridge and continue to lose ground.
Eowyn relentlessly charges at the Uruks lying on the bridge, still supported by her elven allies. Rohan’s Warriors pile onto the bridge to join their comrades and to engage the captain and his Uruks, while on the other side of the battlefield, the remaining elves wait for Haldir to join them in their own charge. The remaining Uruk-hai forces from the middle bridge fall back to the objective to defend it from what will come if the bridges fall.
Gandalf fails to distract the Uruk-hai captain a second time, as the captain was prepared and used all his power to resist the wizard. The Nazgul glides back to join the berserkers while trying to distract his wizard nemesis, but once again to no avail.
The Uruk-hai crossbows let loose a volley against the elves preparing their charge. A bolt catches the edge of Haldir’s blade sending it off-target, while the elf next to him takes a bolt in the gut and drops to his knees before passing on. Upon seeing another elf drop the berserkers let out a bloodthirsty roar. The remaining Galadhrim archer takes aim and sends his arrow right through the neck of the first berserker across the bridge, silencing his roar once and for all.
Rohan loses a man to the Uruk-hai captain on the bridge, while Eowyn continues to get the best of the Uruk-hai on the bridge, but she cannot finish them off as they scramble for their lives.
The Uruk-hai once again take the fight to their Rohan counterparts, surging forward on both bridges. The elves gather some support from the middle bridge to prepare for the upcoming push across the bridge. Haldir pulls out his bow and takes out one of the Uruk-hai on the middle bridge. The Uruk-hai on the north bridge prove to be too much for the Rohan warriors and they claim another life.
The forces of good make a huge surge forward across the bridges. Gandalf brings the Uruk-hai captain to his knees with his immobilize spell while moving back behind a wall to shield himself from the Nazgul. The Nazgul turns his attention to Eowyn, who cowers in fear. Lucky for Eowyn, her elf companion jumps in and fends off the Uruk-hai who tries to take advantage of her distraction.
The Uruk-hai charge back into Eowyn as the Dwimmerlaik shows no mercy towards her. However, another surge forward from the forces of good seems to devastate the Uruk-hai. Haldir and his elves charge the Uruk-hai captain from the south bridge while the Warriors of Rohan reengage the Uruks on the North bridge. Gandalf again proves too much for the Uruk-hai captain and freezes him where he stands. It looks grim for the Uruk-hai as the fight is brought to them from all sides.
Haldir, seeing Eowyn confronted with many Uruk-hai, dispatches the Captain in front of him with ease, trying valiantly to come to her aid. However, it is too late for her. The onslaught of the Dwimmerlaik and the Uruk-hai prove to be too much for Eowyn and she goes down trying to defend herself from the flurry of blades around her.
Both forces have sustained significant loses and the battle is nearing an end. The leaders from both sides rally their troops and surge forward at the nearest enemies. Gandalf continues to wreck havoc on the mind of the Uruk-hai captain. The Dwimmerlaik has had enough of the ongoing battle with the Grey wizard and withdraws from the north bridge. Haldir cleaves another Uruk-hai as the rest of the forces of good struggle to gain the upper hand in combat.
With another rallying charge, the forces of good swarm into the remaining Uruk-hai. Gandalf, seeing the Nazgul hanging back, decides to press the advantage and runs to join the good forces on the middle bridge while continuing to give the warriors of Rohan on the north bridge the upper hand over the last Uruk-hai captain.
As the battle rages on, the Dwimmerlaik uses a momentary opportunity to take Gandalf by surprise and saps the rest of his will. With this, the radiant glow from Gandalf’s staff flickers and dies, leaving the forces of good feeling entirely vulnerable to archer fire, and feeling uneasy.
Haldir heroically takes it upon himself to attack the Dwimmerlaik while it is distracted and dispatch him back to his master. He yells, “With me!” to his fellow elven warrior and they charge.
The Dwimmerlaik turns to Haldir and lets out a terrifying screech that stops Haldir and his ally dead in their tracks. They are too horrified and their courage fails them.
The Dwimmerlaik falls back behind the wall as the Uruk-hai crossbows send a volley of bolts into the frozen Haldir, taking the hero down.
The few forces of good, rallied by Gandalf, charge the middle of the battlefield in one last desperate attempt to fight back the Uruk-hai. Gandalf’s whirl of staff and sword attacks take a lone Uruk-hai Warrior by surprise and he is quickly felled. The other good warriors, however, do not fair so well against their foes and all meet their demise.
Gandalf stands alone, but is determined to dispatch these foul creatures. Gandalf engages one of the Uruk-hai as 3 others close in on him. Gandalf points his staff at 2 of them and smites them both with a destructive blast emitted from the wizard’s staff.
The battle continues for what seems like ages as the wizard continues to battle the creatures from Isengard. The wizard uses everything he has to fend off the evil captain and his companions, but their brutal savagery proves to be too much for the ageing wizard and he falls to the might of the Uruk-hai. A piercing screech from the Dwimmerlaik can be heard echoing through the countryside.
Thank you all for reading, I hope you enjoyed it. I am writing in this style in hopes that I may be used in GBHL’s Bedtime Batreps and to hopefully make it more like a story rather than a report. If you would like to see something different or more of the same please let me know. I would like to start doing some battle reports on a fairly regular basis if I can continue to find people to play with me.
MWL_Rambo
 Top
Top