The One Ring
http://wwww.one-ring.co.uk/

Badner´s improvement (hopefully) ;-)
http://wwww.one-ring.co.uk/viewtopic.php?f=50&t=31040
Page 1 of 2

Author:  Badner [ Tue May 26, 2015 10:39 am ]
Post subject:  Badner´s improvement (hopefully) ;-)

Hello everybody!

Yes, this is an other WIP. I created this thread, because I want to improve my painting skills and paint more miniatures. I hope that this WIP will show my improvement. My aim is that one day, I will be able to buy any miniature without being afraid that my painting is not good enough for the miniature. So feel free to give me some feedback.

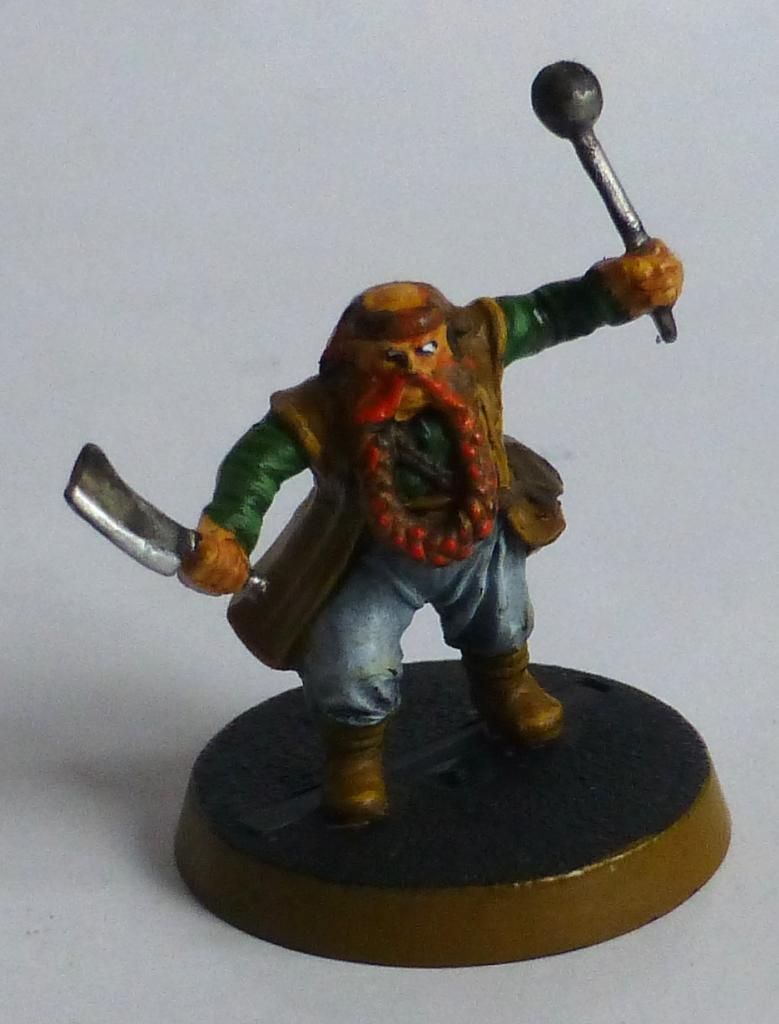
I want to start with Bombur from my "How can I improve my painting skills"-thread:
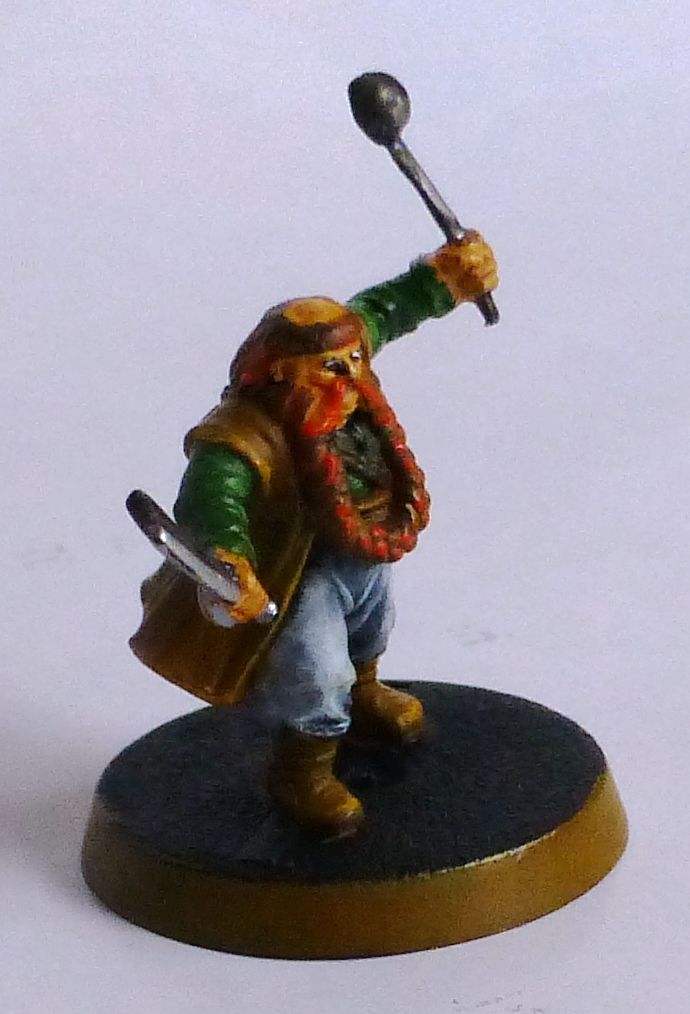
Image

Image

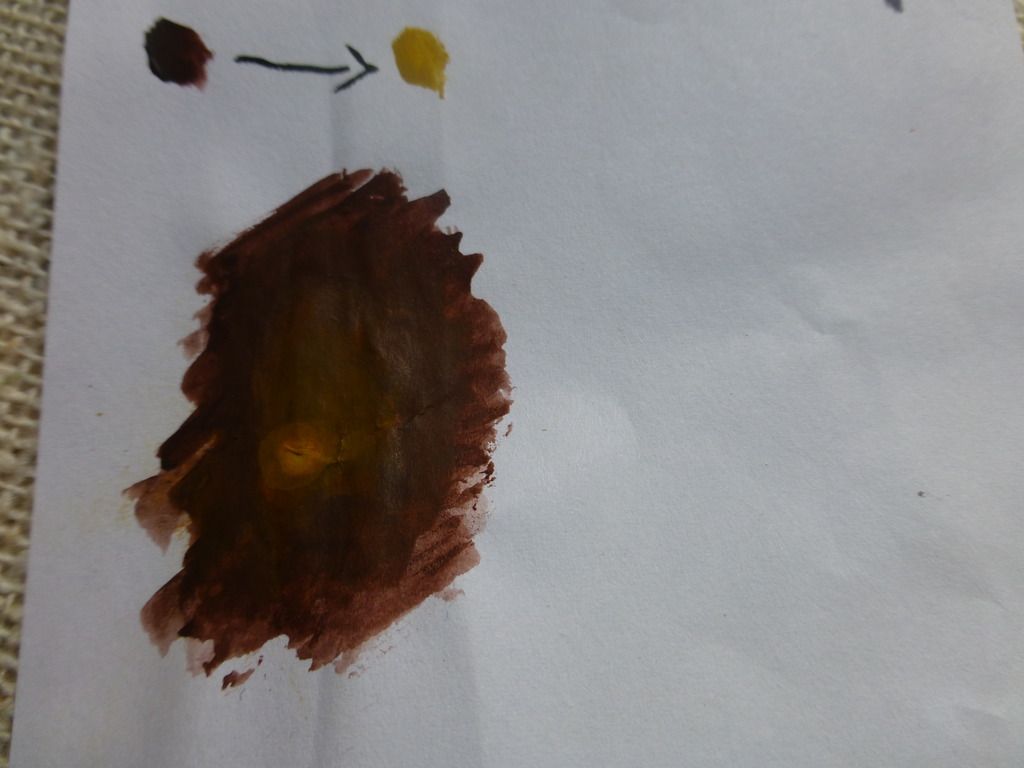
Some months later, I bought some browns and skin colours from Vallejo. After that, I tried to do some blending on a piece of paper. I went from Scorched Brown to Bubonic Brown:
Image

If you are interested in it, I will upload some pictures of my WIP Erebor warriors.

Cheers,
Badner
Author:  Gandlaf the Grey [ Tue May 26, 2015 4:33 pm ]
Post subject:  Re: Badner´s improvement (hopefully) ;-)

Badner, I will do what I can to help you.
It seems you have some good brush control and the aim now is to push this forward. If you are concerned at your standard, don't be, you are better than I was when I started.
I see you are starting with blending, the paper is way too wet so it seems your brush is overloaded. Wipe your brush on a paper towel or your thumb to remove most of the residue. You are aiming for the paint to almost dry as the stroke finishes.
Search YouTube for tutorials on glazing. Get your glazing right and blending will follow.
There are several forms of blending, wet blending, two brush method, feathering and we can later find what fits for you.
I work my blends by several layers of glaze, applying mid tones to smooth them out. It's a technique I'm comfortable with.
I am about to start the same figure in the next day or two hopefully, and if so I will do you a quick tutorial on the colours and how to apply them.
In the mean time research glazing and practise this.
Can you answer these
What brushes are you using ?
What's the extent of your paint collection ?
Lastly
Look at this tutorial I did but in particular how I do the eyes. I find it simple and one you can easily practise a few times and you will see yourself improve.
kb.php?a=189

Author:  Badner [ Tue May 26, 2015 9:51 pm ]
Post subject:  Re: Badner´s improvement (hopefully) ;-)

Thank you very much.

I used a lot of water, thats right. I did this, because of this link: http://www.reapermini.com/Thecraft/15 However, the picture might show the paper in a differnet way, because the paper was completly dry, when I took the picture.

1. I am using the old GW brushes. I do have the Fine detail brush, the wash brush, the medium and the large dry brush and a GW standard brush from an even older range (I can upload a picture, if you want).

2. I do not have a lot of differnet paints from the same colour, but I do have all colours. I started tabletop several years ago, but I took a long brake. So I do have the old GW paints (these ones: http://lh6.ggpht.com/_-HZLorI1B0w/SvslA ... sample.jpg). They are quite old, so some of them are dryer than they should be. I bought some Vallejo browns and skin colours, so I do have six skin colours and six browns. For the other colours, I do only have one to three differnet paints.

3. I will have a closer look at the tutorial tomorrow. However, I already improved my eye-painting technique since I took this picture. I will upload a picture of an warrior of Erebor, which I painted some days ago. I do only have to wait until the sun shines again.

Author:  Gandlaf the Grey [ Wed May 27, 2015 4:50 am ]
Post subject:  Re: Badner´s improvement (hopefully) ;-)

Thanks that gives me an idea.
I will paint Bombur using Vallejo paints and try to keep the palette fairly simple. I also have a lot of the old GW range and will use them as well.
For your blending, it was not how much water you used to thin the paint, it was how much was in your brush when you applied the paint. It is that you need to reduce. Remember you can always add a touch more paint to your brush, to remove mistakes takes longer.
Using the system I use you will hardly ever apply a wash, it's all glazing.
Give me a few days and I will get the tutorial done and we will see where we go from there.

Author:  Badner [ Wed May 27, 2015 12:45 pm ]
Post subject:  Re: Badner´s improvement (hopefully) ;-)

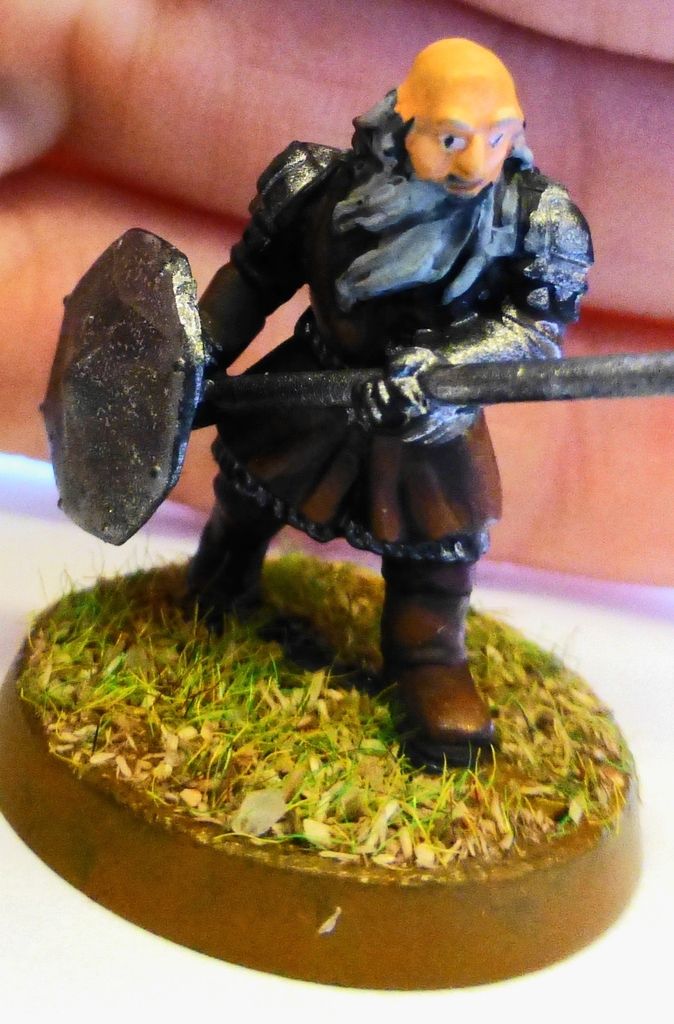
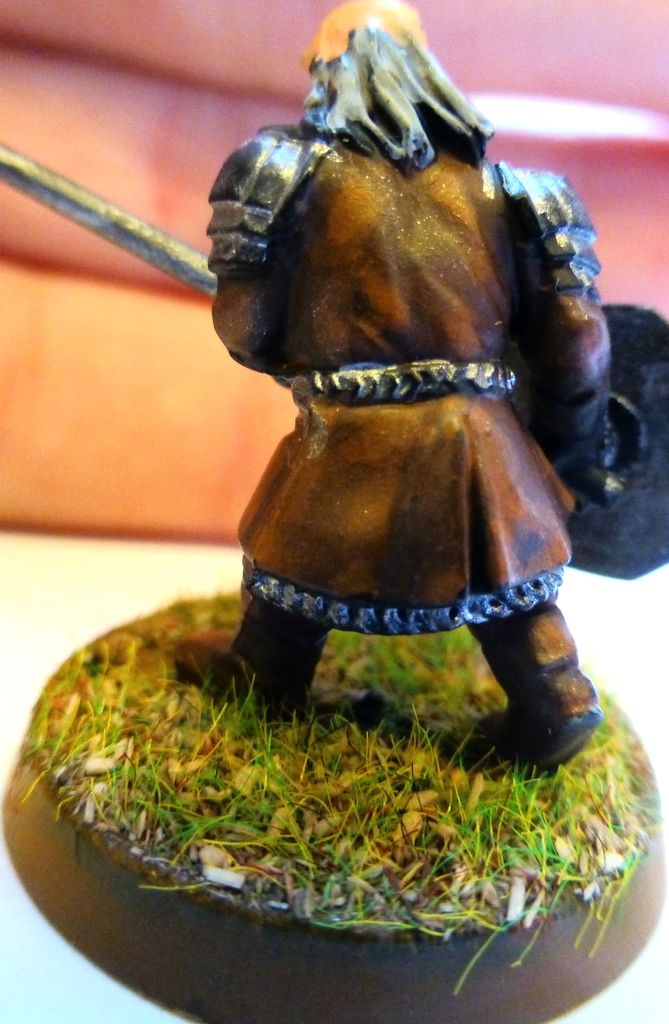
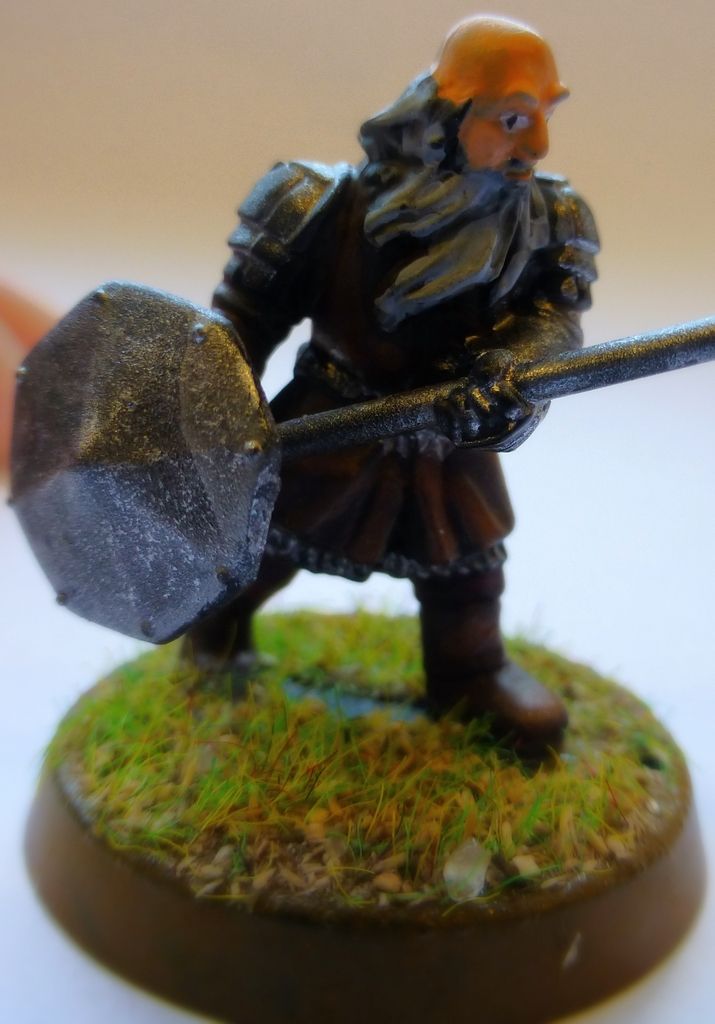
okay, thank you. Here are some pictures of my Erebor dwarf:

Image

Image

Image

I think that the highlighting is a bit better than it looks like on the photos. I do not really know, how I can make the metal look better. At the moment, I do only paint it with several layers of boltgun metal and highlight it with chainmail.
Please tell me if you want to see any other pictures.

Author:  Gandlaf the Grey [ Wed May 27, 2015 2:54 pm ]
Post subject:  Re: Badner´s improvement (hopefully) ;-)

Everything fine, I do not need anymore for now.
Hopefully I will get the tutorial done quickly, but I will update here once it's done.

Author:  Badner [ Wed May 27, 2015 5:14 pm ]
Post subject:  Re: Badner´s improvement (hopefully) ;-)

Thanks. You don't need to hurry up.
At the moment, I am trying to do the highlighting by adding several thin layers. I think that my layers are thin enough and the brush is dry enough. However, I find it difficult to mix the colours in the right way. Sometimes, the difference is not noticeable and sometimes it is too big.

Author:  Gandlaf the Grey [ Wed May 27, 2015 9:20 pm ]
Post subject:  Re: Badner´s improvement (hopefully) ;-)

Only experience will get you there with mixing paints to the right consistency I'm afraid. I don't always get it right and have to re check things, re work errors and so on.
I've done some tonight and have the figure about 50% done so far with progress shots along the way.
I intend to have this done by the weekend as I have a lot on. Once this is finished only three more dwarves then scenery beckons me.

Author:  Badner [ Thu May 28, 2015 3:41 pm ]
Post subject:  Re: Badner´s improvement (hopefully) ;-)

Okay, I will practice on my dwarves.

Author:  Gandlaf the Grey [ Sat May 30, 2015 3:07 pm ]
Post subject:  Re: Badner´s improvement (hopefully) ;-)

This is on my thread but if you have missed it I have included it below. I hope it helps and if you have any questions then please shout out.
http://mallysminiatures.blogspot.co.uk/ ... orial.html

Author:  Badner [ Sat May 30, 2015 6:54 pm ]
Post subject:  Re: Badner´s improvement (hopefully) ;-)

Thank you very much. Would you suggest me to paint Bombur again, or does that make no sense, because I would loose too much details?

Author:  abcdefg [ Sat May 30, 2015 7:40 pm ]
Post subject:  Re: Badner´s improvement (hopefully) ;-)

Strip it first? Dettol is pretty cheap and does a fantastic job on plastic and metal

Author:  Badner [ Sat May 30, 2015 8:32 pm ]
Post subject:  Re: Badner´s improvement (hopefully) ;-)

Thank you for this tip, I never heard about an option for plastic minis. Are you talking about this: http://dettol.at/produkte-fuer-zuhause- ... ns-gel.php ?
How do you use it? Do you dip the mini inside it and do you have to do anything else with it after this? How long should it stay inside it?

Author:  Galanur [ Sat May 30, 2015 8:39 pm ]
Post subject:  Re: Badner´s improvement (hopefully) ;-)

Lol man... anti bacterian product... nice link XDD

Author:  Badner [ Sun May 31, 2015 7:02 am ]
Post subject:  Re: Badner´s improvement (hopefully) ;-)

I was also a bit confused, so I asked him. However, that is the first thing I found when I googled Dettol. Do you know what he means and can you send me a link?

Author:  abcdefg [ Sun May 31, 2015 7:29 am ]
Post subject:  Re: Badner´s improvement (hopefully) ;-)

Yep thats it, but you want the brown one: http://www.amazon.co.uk/Dettol-Liquid-A ... rds=dettol

Put the miniatures in it for overnight or so (Dettol won't damage plastic - I've left them for a few days before and they've been fine).
Then brush off the paint with an old, stiff brush whilst still holding them in the dettol. Switch to new dettol either for a final brush off/rinse or to repeat the soak again if needed. Finally, when all the paint is off rinse well in soapy water (fairy liquid works well) to remove the dettol. Make sure all the paint is off before adding to the water because if the dettol/paint residue hits water it turns to a sticky goo.

But yeah, easy to do and effective, let me know if you have any problems

Author:  Badner [ Sun May 31, 2015 1:16 pm ]
Post subject:  Re: Badner´s improvement (hopefully) ;-)

Thank you, I will order it. Does it also work on resin?

Author:  abcdefg [ Sun May 31, 2015 2:28 pm ]
Post subject:  Re: Badner´s improvement (hopefully) ;-)

I've no idea I'm afraid. I've yet to buy a resin miniature

Author:  Badner [ Tue Jun 02, 2015 2:31 pm ]
Post subject:  Re: Badner´s improvement (hopefully) ;-)

Maybe I can find a piece of resin that I can paint and try it out.
Maybe I will also document my painting process on Bombur in the same way you did it at your tutorial.
Today, I painted two warriors of Erebor and tried to use several, very thin layers. I am quite happy with the results. However, I do have one problem: The paint chiped off from the raised areas very fast. This means that some of the raised areas are black instead of a very bright colour.

Author:  Gandlaf the Grey [ Tue Jun 02, 2015 3:41 pm ]
Post subject:  Re: Badner´s improvement (hopefully) ;-)

One issue of glazing, you have to be careful how you handle the mini. I only ever hold the base as paint can easily rub off.

Page 1 of 2 All times are UTC
Powered by phpBB © 2000, 2002, 2005, 2007 phpBB Group
http://www.phpbb.com/