Malky
First things first we need to sort a couple of things.
1. This fort looks wonderful and has been put together with thought and patience.
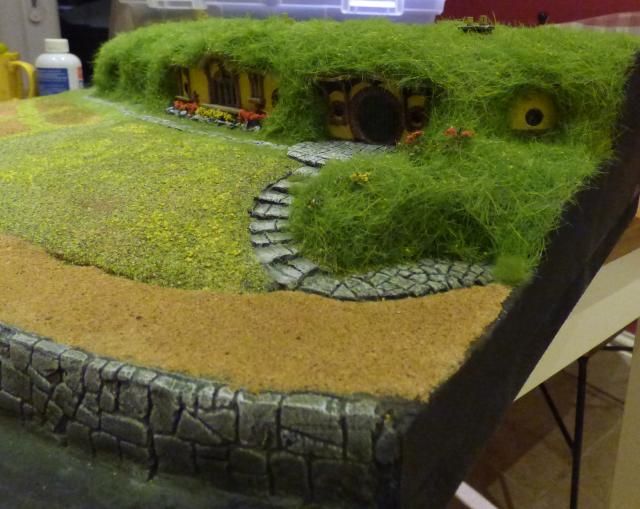
2. There is no easy way to say this but if you want this to look the part then cutting corners will have to stop. Concentrate on a small part each time you work on it and slowly watch it come together. My bag End is my example and I'm now concentrating on fine details which are slowly changing its appearance. I've still loads to do as I have a mental vision I'm workng too. You need that vision whether in your head or on paper as it's obvious you have the talent to make this special.
Now look at the below photo.

Concentrate on the wall. This is so easy to do.
I covered the foam with polyfilla. It was only a few millimetres thick and I spread it out fairly smooth, but I'm not a plasterer so it wasn't like a snooker table !!!
When it had dried I even filed a couple of large bits down, so that's how imprecise you can be.
Now the fun starts. I got a sharp tool ( actually the point of a modelling file ) and then scratched out the brickwork. The whole wall is about 35cm long and took no more than 20 mins to scratch out the brickwork pattern.
As with polyfilla, some lumps fell out but that's great, it creates a realistic damage affect.
Once done I covered it all in black. Now for painting.
These are the old colour range but are easy to find comparisons. The idea is going through dark to light browns and greys to create a layered effect.
Again this is easy and very quick. Maybe another 15 mins to paint the wall.
You simply drybrush the colours on. Make sure you have very little paint on your brush, better to go over an area a few times than too much in one go. The brush has to be literally dry with hardly any paint showing. Test on some paper or kitchen roll be applying to the model.
Use progressively lighter applications as below, in this order
Shadow grey - snakebite leather - codex grey - graveyard earth - fortress grey - bleached bone - skull white.
Now apply a liberal coat of Catchan green that's watered down to four parts water one part paint.
When dry apply final drybrushes of fortress grey then skull white.
Voila - done in lees than an hour from the start of scribing out the bricks to the finished wall and I wouldn't call that cutting corners. You can see how I've only used the lightest colours at the very top edge of the wall and all those colours make it look like it's been there forever.
I find this one of those jobs that as you paint each layer, you see it coming to life, and as it's drybrushing, this happens very quickly.
Think of it this way, the wall is a massive part for any fort / castle and needs to look the part. Get it right and the rest will only make it look better.
 Top
Top Top
Top Top
Top Top
Top Top
Top Top
Top Top
Top Top
Top Top
Top Top
Top Top
Top Top
Top Top
Top Top
Top Top
Top Top
Top Top
Top Top
Top Top
Top Top
Top


