jmh_stirling wrote:
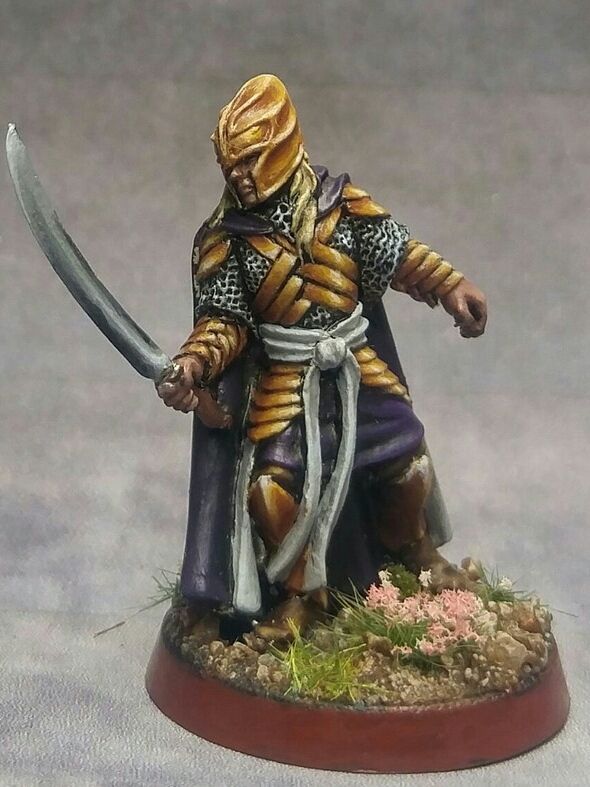
I love the armour - can you give a step by step guide on how you do it (with pics, pretty please)? It looks incredible. Kudos.
Cheers! And yes, this is something I definitely plan on doing as soon as I can figure out a decent photography setup (and get my hands on a good camera)
The exact process varies from mini to mini, since the washing and rehighlighting is done until it looks "right" but the basic process is:
Basecoat GW boltgun metal or Army Painter gunmetal (I don't recommend using new GW leadbelcher)
Wash with slightly thinned black (I use GW badab black while I still have some, but AP dark tone ink is supposed to be the best replacement)
Re-highlight with gunmetal, leaving the recesses shaded. This forms the foundation for the rest of the work to come.
Wash again, 3-4 times. Keep the washes light and thin, and be careful they don't pool up. I do most of this with a GW detail brush for control of exactly what and where gets tinted by the washes. For the second or third of these washes, switch from black to brown (or mix the two) to add some warmth to the shadows and give the metal a subtle dirty feel. Again, old devlan mud was great for this - thinning down the new agrax earthshade and mixing it with a black wash will do, and AP strong tone ink is very similar to old devlan.
Edge highlight. Gunmetal first, followed by a thinner, finer highlight of chainmail (AP plate mail) and finally a sparse highlight of mithril where you want the "bright spots" to be. Some of the chips and dents were added at this stage too, with a mix of black and a tiny bit of very dark brown underlined with mithril.
Washes again, much thinner, more like glazes. Anywhere between one and ten, with additional edge highlighting and battle damage thrown in until it looks right. This is where I added most of the brown tint, as I wanted the bulk of the metal highlights and shades in place before adding the grime.
Finally, the "fresh" battle damage (which won't be tinted by any glazes) is the last thing to go on, along with a final, fine highlight of thinned mithril on the bright spots.
One unorthodox thing I did while working on this mini (which I haven't tried before) was to add to the beaten-up look of the metal on the back of the cuirass by thinning gunmetal down to a glaze with a mix of flow improver, glaze medium and water, and applying it carefully with a very fine brush. that effectively scattered the little silver flakes that give metallic paints their shine unevenly over the surface - I wasn't sure how well it would work out, but after a couple of glazes I'm very happy with the result, it looks like a scattering of tiny chips and nicks. You could just use metallic medium for this, but I don't have any.
That turned into a bigger post than I intended, but i hope it helps~
 Top
Top Top
Top Top
Top Top
Top Top
Top Top
Top Top
Top Top
Top Top
Top Top
Top Top
Top Top
Top


