All times are UTC


It is currently Fri Nov 15, 2024 8:54 am


Post new topic Reply to topic  [ 741 posts ]  Go to page Previous  1, 2, 3, 4, 5, 6 ... 38  Next
Author Message
 Post subject: floor in.
PostPosted: Mon May 10, 2010 9:28 pm 
Elven Elder
Elven Elder
User avatar
Offline

Joined: Thu Apr 01, 2010 11:33 pm
Posts: 3688
Location: Atlanta GA. U.S.A.
Images: 14
I was concerned if I used plastic card for the floor that light would show through. It seems to be OK

Image

I need to put another coat of paint on the walls and seal them before I install the windows and base boards. I have started work on the fire place tools and curtain rods for the windows. I have totally failed to make decent hinges for the door. Must be some reason doors are square after all.. I am going to finish painting the floor before I glue and tape up the hobbit hole.

I still have some time before I glue up. Now would be a good time for suggestions if any one has any

_________________
"the same as a duck you must be made of wood"
Top
  Profile  
Reply with quote  
 Post subject:
PostPosted: Tue May 11, 2010 6:51 am 
Loremaster
Loremaster
Offline

Joined: Thu May 06, 2004 6:37 pm
Posts: 1006
Location: Medway, Kent UK
Images: 1
Looking pretty darn good 8)
Top
  Profile  
Reply with quote  
 Post subject: tape up
PostPosted: Tue May 11, 2010 9:29 pm 
Elven Elder
Elven Elder
User avatar
Offline

Joined: Thu Apr 01, 2010 11:33 pm
Posts: 3688
Location: Atlanta GA. U.S.A.
Images: 14
I have done some more work. The last photo was to dark to show much detail. I have added some of the windows and the base board. I decided to add the unpainted parts to the fire plac now because I realized I wood not be able to paint them with the logs in place.

Image

I have glued the hobbit hole to the base and taped up the gaps with plaster bandage. The plaster bandage makes a good surface to attach plaster details and covers large gaps and spaces well. When I begin to work on the outside details the plaster bandage makes a good foundation..

Image

Image

You can see the details a little better. The dry wall filler I use next sticks well to the bandage. This might be over kill for a diorama but This is going to be a gaming piece. I want to be able to handle it with a minimum of damage. This is another reason I made it out of wood. If I had used foam or spray foam some one would crush it just enough for the pain and filler to chip off. The spray foam is really prone to this. All you have to do is put it back in the box wrong. It just doesn't ware well.

I have got a lot to paint but I will not be able to resist playing with the stair way when it is dry enough to handle. I would still like to know which stair way you think looks the best

_________________
"the same as a duck you must be made of wood"
Top
  Profile  
Reply with quote  
 Post subject:
PostPosted: Wed May 12, 2010 10:40 am 
Wayfarer
Wayfarer
Offline

Joined: Sun Apr 25, 2010 1:03 pm
Posts: 34
Location: Fort Bragg, NC, USA
For what it's worth, I think the sloped hill looks better.

What an amazing terrain piece! Really good work.
Top
  Profile  
Reply with quote  
 Post subject: new details
PostPosted: Thu May 13, 2010 9:11 pm 
Elven Elder
Elven Elder
User avatar
Offline

Joined: Thu Apr 01, 2010 11:33 pm
Posts: 3688
Location: Atlanta GA. U.S.A.
Images: 14
I have to glue this and tape it to fill the voids.I think you can see the basic shape now.

Image

I don't think I am going to include the road on the base. If I keep it separate I will have more options.

Image

I have to work on the top and some more on the windows and doors.

Image

I want to have enough room to place figures inside so I am going to make some smaller furniture Let me know if you have any suggestions.

I am thinking of some very shot interior wall sections to give the illusion that there are more rooms. I need some ideas for some thin details about the interior windows. Unless I can find some silk ribbon the curtains look out of scale and I am not going to use them.

_________________
"the same as a duck you must be made of wood"
Top
  Profile  
Reply with quote  
 Post subject: hobbit hole almost finished new tree
PostPosted: Sun May 16, 2010 3:07 pm 
Elven Elder
Elven Elder
User avatar
Offline

Joined: Thu Apr 01, 2010 11:33 pm
Posts: 3688
Location: Atlanta GA. U.S.A.
Images: 14
I decided to start a few small projects while I am waiting to find out how much time it is going to take to repair the leak in the shop. I will work on the deck until I can get set back up. The Hobbit hole is drying and I will probably finish it up this week. I started on a tree that was inspired by several on this site.

Image

I think it is a Honeysuckle. I am going to search the yard and local scrub lot for a few more vines to use as roots. The privet twig has a good shape but is not convincing to me.

Image

I used a little green stuff to blend or hide the right angle cut off. I think the tree has a good over all shape. I wont add much to it.

Image

I am not sure if I am going to use twisted wire or woodland scenic tree armatures to add the foliage. The real tree fine detail parts are way to fragile and dry out quickly. Clump foliage will match better my tree collection.Sadly it is almost as fragile as the real tree.

_________________
"the same as a duck you must be made of wood"
Top
  Profile  
Reply with quote  
 Post subject: new photo
PostPosted: Tue May 18, 2010 12:04 am 
Elven Elder
Elven Elder
User avatar
Offline

Joined: Thu Apr 01, 2010 11:33 pm
Posts: 3688
Location: Atlanta GA. U.S.A.
Images: 14
I painted and added the first coat of scenic material. It is too wet to handle so I will have to add static grass and some of the flowers tomorrow.

Image

Image

I worked a little on the tree. It is a honeysuckle and I found some nice twisted branches to add to the top.

_________________
"the same as a duck you must be made of wood"
Top
  Profile  
Reply with quote  
 Post subject:
PostPosted: Tue May 18, 2010 1:58 pm 
Craftsman
Craftsman
User avatar
Offline

Joined: Sat Nov 01, 2008 3:10 pm
Posts: 490
Location: Opende,Groningen,Netherlands
Images: 4
It looks great, quite detailed but also good to play a game on. :yay:
Nice tree btw, perhaps I should start collecting branches as well.

keep up updated.

_________________
“People often claim to hunger for truth, but seldom like the taste when it's served up.”
My wip
Top
  Profile  
Reply with quote  
 Post subject:
PostPosted: Tue May 18, 2010 2:10 pm 
Elven Warrior
Elven Warrior
User avatar
Offline

Joined: Fri Aug 28, 2009 3:46 pm
Posts: 897
Location: Hear the sinister whisper of steel on leather? The quiet footsteps? You've found me.
Great terrain, lots of detail. :yay:

_________________
Flying is the practice of trying to crash into the ground and missing.
Top
  Profile  
Reply with quote  
 Post subject: new detail
PostPosted: Thu May 20, 2010 2:02 pm 
Elven Elder
Elven Elder
User avatar
Offline

Joined: Thu Apr 01, 2010 11:33 pm
Posts: 3688
Location: Atlanta GA. U.S.A.
Images: 14
I added static grass and some flowers. The frustrating thing about this stage of things is the long drying times. I had to put it aside until it is dry enough to handle again.

Image

All of these models will be dry enough to add weeds and tall grass at the same time. I want to work on the tree but the club has a event this week end and I have to work on that.

_________________
"the same as a duck you must be made of wood"
Top
  Profile  
Reply with quote  
 Post subject:
PostPosted: Thu May 20, 2010 3:24 pm 
Loremaster
Loremaster
User avatar
Offline

Joined: Sat Sep 19, 2009 8:57 am
Posts: 1223
very nice, I admire your work. Always great to see things other people have made. Can't wait for more!
Top
  Profile  
Reply with quote  
 Post subject: The Short Cut to Mushroom Tree.
PostPosted: Mon May 24, 2010 10:40 pm 
Elven Elder
Elven Elder
User avatar
Offline

Joined: Thu Apr 01, 2010 11:33 pm
Posts: 3688
Location: Atlanta GA. U.S.A.
Images: 14
I have been working on The Short Cut to Mushroom Tree. I have added more roots and filled out the general tree shape. I am concerting using the polyvinyl fiber netting for the foliage. However, I do not like the way it turned out on the D&D trees. I am afraid the Trees look like Marge Simpson and action Jackson at the 1974 high school prom. I am going to try some more trees before I commit.

Image

The tree roots look a little large. I think I can pull off the effect if I build up the road on the top of the hill.

Image

I am afraid I really need a newer camera for close ups.

Image

I did not get much of a chance to work on the Hobbit hole this weekend. I decided to up grade my windows after looking at the Bags end Build off tread again.

_________________
"the same as a duck you must be made of wood"
Top
  Profile  
Reply with quote  
 Post subject: Better idea.
PostPosted: Tue May 25, 2010 3:13 pm 
Elven Elder
Elven Elder
User avatar
Offline

Joined: Thu Apr 01, 2010 11:33 pm
Posts: 3688
Location: Atlanta GA. U.S.A.
Images: 14
I think this photo shows what I have in mind. I swapped around some of the roots. As much as I liked the tall curved root it was just to big and had to go.

Image

I will have to put the base back on the belt sander and work on the road. I tacked the tree together with hot glue so I can make more changes if need be.

_________________
"the same as a duck you must be made of wood"
Top
  Profile  
Reply with quote  
 Post subject:
PostPosted: Tue May 25, 2010 5:47 pm 
Elven Warrior
Elven Warrior
User avatar
Offline

Joined: Fri Aug 28, 2009 3:46 pm
Posts: 897
Location: Hear the sinister whisper of steel on leather? The quiet footsteps? You've found me.
Your terrain is quite awesome. :yay:

_________________
Flying is the practice of trying to crash into the ground and missing.
Top
  Profile  
Reply with quote  
 Post subject:
PostPosted: Tue May 25, 2010 5:53 pm 
Ringwraith
Ringwraith
User avatar
Offline

Joined: Mon Jul 18, 2005 2:56 pm
Posts: 3736
Location: The Height of Nonsense
How did I miss this thread? With glowing fires! Well done!

_________________
Published ebooks:
Instrument of the Empire
A Note of Defiance
Phantom Ships, Ghost Flotilla
More to come!
Top
  Profile  
Reply with quote  
 Post subject: the road to mushrooms
PostPosted: Wed May 26, 2010 10:20 pm 
Elven Elder
Elven Elder
User avatar
Offline

Joined: Thu Apr 01, 2010 11:33 pm
Posts: 3688
Location: Atlanta GA. U.S.A.
Images: 14
Image

I made a mold of my road pieces because I can not get any more. They are long OOP. I am going to cut apart the castings so that the road will curve more to my liking. I will have enough parts for the river bridge and for walk ways in goblin town and Moria.

Image

I am going to curve the road around the Mushroom tree by cutting some of the cast sections apart. I will add pine bark and details when I finalize the shape and tape the model.

Image

I have the shape of the tree about where I like it. I am going to build a few more and decide which type of foliage I am going to use before I glue it together.

Image

_________________
"the same as a duck you must be made of wood"
Top
  Profile  
Reply with quote  
 Post subject: small space
PostPosted: Thu May 27, 2010 9:23 pm 
Elven Elder
Elven Elder
User avatar
Offline

Joined: Thu Apr 01, 2010 11:33 pm
Posts: 3688
Location: Atlanta GA. U.S.A.
Images: 14
I was working on some sunken roads for my terrain collection when I realized I could make the hobbit holes much smaller and still maintain a nice shape if I made them facades.

Image

I will be able to fit two nice looking hobbit holes in the 56cm by 32cm allowed for in The Battle of Bywater scenario. I do not know why I did not think of this before. It is very common in model railroading. I use 3D back drops all the time. I could use corner pieces for the barrow downs as well.

Image

The molds will be dry tomorrow and I will build forms and cast the back up mold. I will be ready to cast shortly.

_________________
"the same as a duck you must be made of wood"
Top
  Profile  
Reply with quote  
 Post subject: Bree
PostPosted: Mon May 31, 2010 8:58 pm 
Elven Elder
Elven Elder
User avatar
Offline

Joined: Thu Apr 01, 2010 11:33 pm
Posts: 3688
Location: Atlanta GA. U.S.A.
Images: 14
Image

I finished the road mold today. I will finish the road to mush rooms tree this week and post a photo. I am waiting on some new Hirst Art molds to begin work on Bree and Helms Deep. I managed to cut out some test fit pieces for detail additions for the restoration project. I will make molds so it will speed the work on the Bree village.
The best news is that the repairs on the shop will not cost as much as I feared so I can build a bigger storage building. :D

_________________
"the same as a duck you must be made of wood"
Top
  Profile  
Reply with quote  
 Post subject:
PostPosted: Tue Jun 01, 2010 10:51 am 
Ringwraith
Ringwraith
User avatar
Offline

Joined: Wed Jul 06, 2005 7:09 pm
Posts: 2393
Location: Southampton, UK
Images: 70
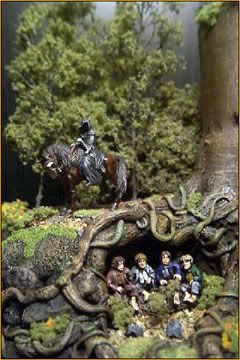
Nice Tree.

Brings back memories of Brian's old diorama.

Image

_________________
You don't have to be great to start. But you do have to start to be great.
Top
  Profile  
Reply with quote  
 Post subject:
PostPosted: Tue Jun 01, 2010 12:46 pm 
Kinsman
Kinsman
User avatar
Offline

Joined: Sat Mar 27, 2010 9:48 am
Posts: 205
durinsbane?

_________________
donuthare - helmsdeepbuilder - love this site
Top
  Profile  
Reply with quote  
Display posts from previous:  Sort by  
Post new topic Reply to topic  [ 741 posts ]  Go to page Previous  1, 2, 3, 4, 5, 6 ... 38  Next

All times are UTC


Who is online

Users browsing this forum: No registered users and 376 guests


You cannot post new topics in this forum
You cannot reply to topics in this forum
You cannot edit your posts in this forum
You cannot delete your posts in this forum
You cannot post attachments in this forum

Search for:
Jump to: