|
All times are UTC |
| It is currently Tue Nov 26, 2024 5:38 pm |
Help with skin, finished product.
Moderator: Ringwraiths
|
|
Page 1 of 1 |
[ 8 posts ] |
|
| Author | Message | |||||
|---|---|---|---|---|---|---|
| theavenger001 |
|
|||||
Joined: Fri Jan 18, 2008 5:03 pm Posts: 1984 Location: Manitoba, Canada Images: 1 |
|
|||||
 Top Top |
||||||


| Anduril Blade of Kings |
|
|||||
Joined: Fri Aug 28, 2009 3:46 pm Posts: 897 Location: Hear the sinister whisper of steel on leather? The quiet footsteps? You've found me. |
|
|||||
| Top |
||||||


| theavenger001 |
|
|||||
Joined: Fri Jan 18, 2008 5:03 pm Posts: 1984 Location: Manitoba, Canada Images: 1 |
|
|||||
| Top |
||||||
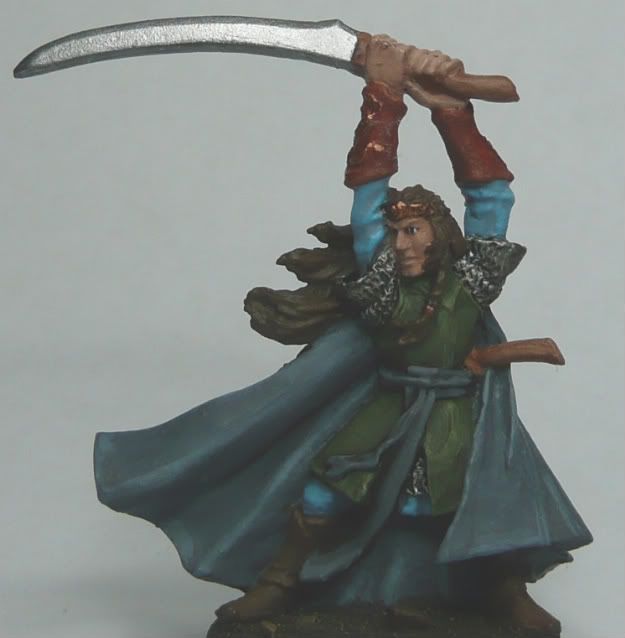
 Criticism!
  I agree that the hair could do with another highlight. I am not so sure about the skin though, I could see that it could use one, but I don't want to wreck it.
  I also noticed that there is some dust on the left bracer and the left knuckles are also messed up a bit.
| captain krak |
|
|||||
Joined: Tue Mar 02, 2010 10:51 pm Posts: 150 Location: Pasadena, CA USA |
|
|||||
| Top |
||||||


 I do agree though that a final highlight to the highest areas of the face and hands would make it just that much better. From what I can see, you've got the skill to do that without worrying about messing up what you've already done.
| MacGothmog |
|
|||||
Joined: Tue May 17, 2005 7:51 pm Posts: 1130 Location: Porto - Portugal Images: 27 |
|
|||||
| Top |
||||||


| theavenger001 |
|
|||||
Joined: Fri Jan 18, 2008 5:03 pm Posts: 1984 Location: Manitoba, Canada Images: 1 |
|
|||||
| Top |
||||||
| MacGothmog |
|
|||||
Joined: Tue May 17, 2005 7:51 pm Posts: 1130 Location: Porto - Portugal Images: 27 |
|
|||||
| Top |
||||||

| theavenger001 |
|
|||||
Joined: Fri Jan 18, 2008 5:03 pm Posts: 1984 Location: Manitoba, Canada Images: 1 |
|
|||||
| Top |
||||||


|
|
Page 1 of 1 |
[ 8 posts ] |
|
All times are UTC |
Who is online |
Users browsing this forum: No registered users and 8 guests |
| You cannot post new topics in this forum You cannot reply to topics in this forum You cannot edit your posts in this forum You cannot delete your posts in this forum You cannot post attachments in this forum |